
Overview
Amazon S3 is de-facto a standard API for cloud storage and most cloud-native application rely on it. At the same time, Microsoft Azure does not offer S3-compatible storage out-of-the-box, complicating migration of such applications to Azure.
Flexify.IO extends Azure Blob Storage with S3-compatible API, making it possible for S3-native applications to store data in Azure.
Steps
To enable S3 API for Azure Blob Storage follow those steps:
-
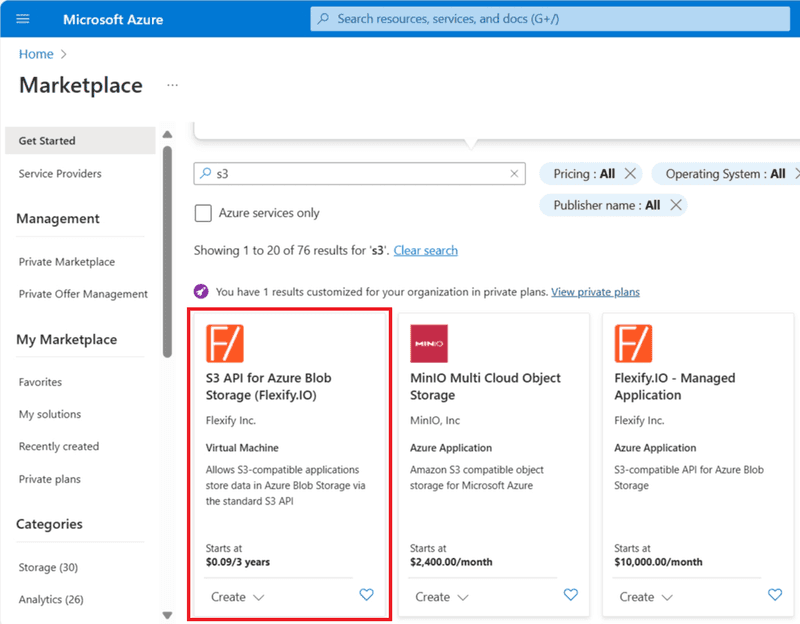
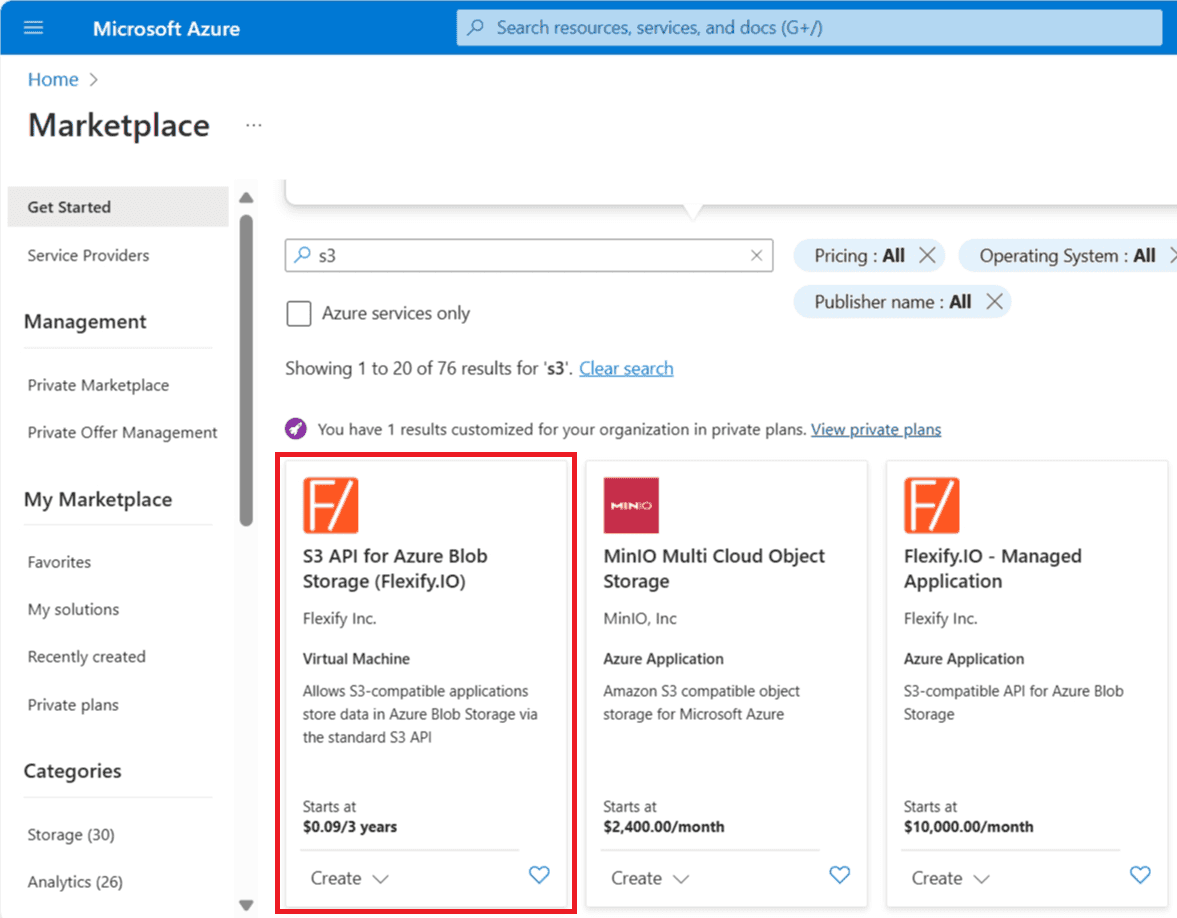
In Azure Portal click Create a resource and search for S3.
-
Select S3 API for Azure Blob Storage (Flexify.IO).
-
Choose either Community Edition or Standard plan and click Create.

-
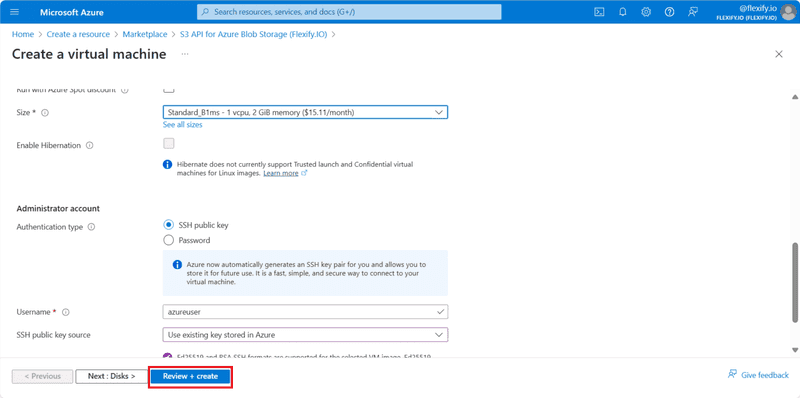
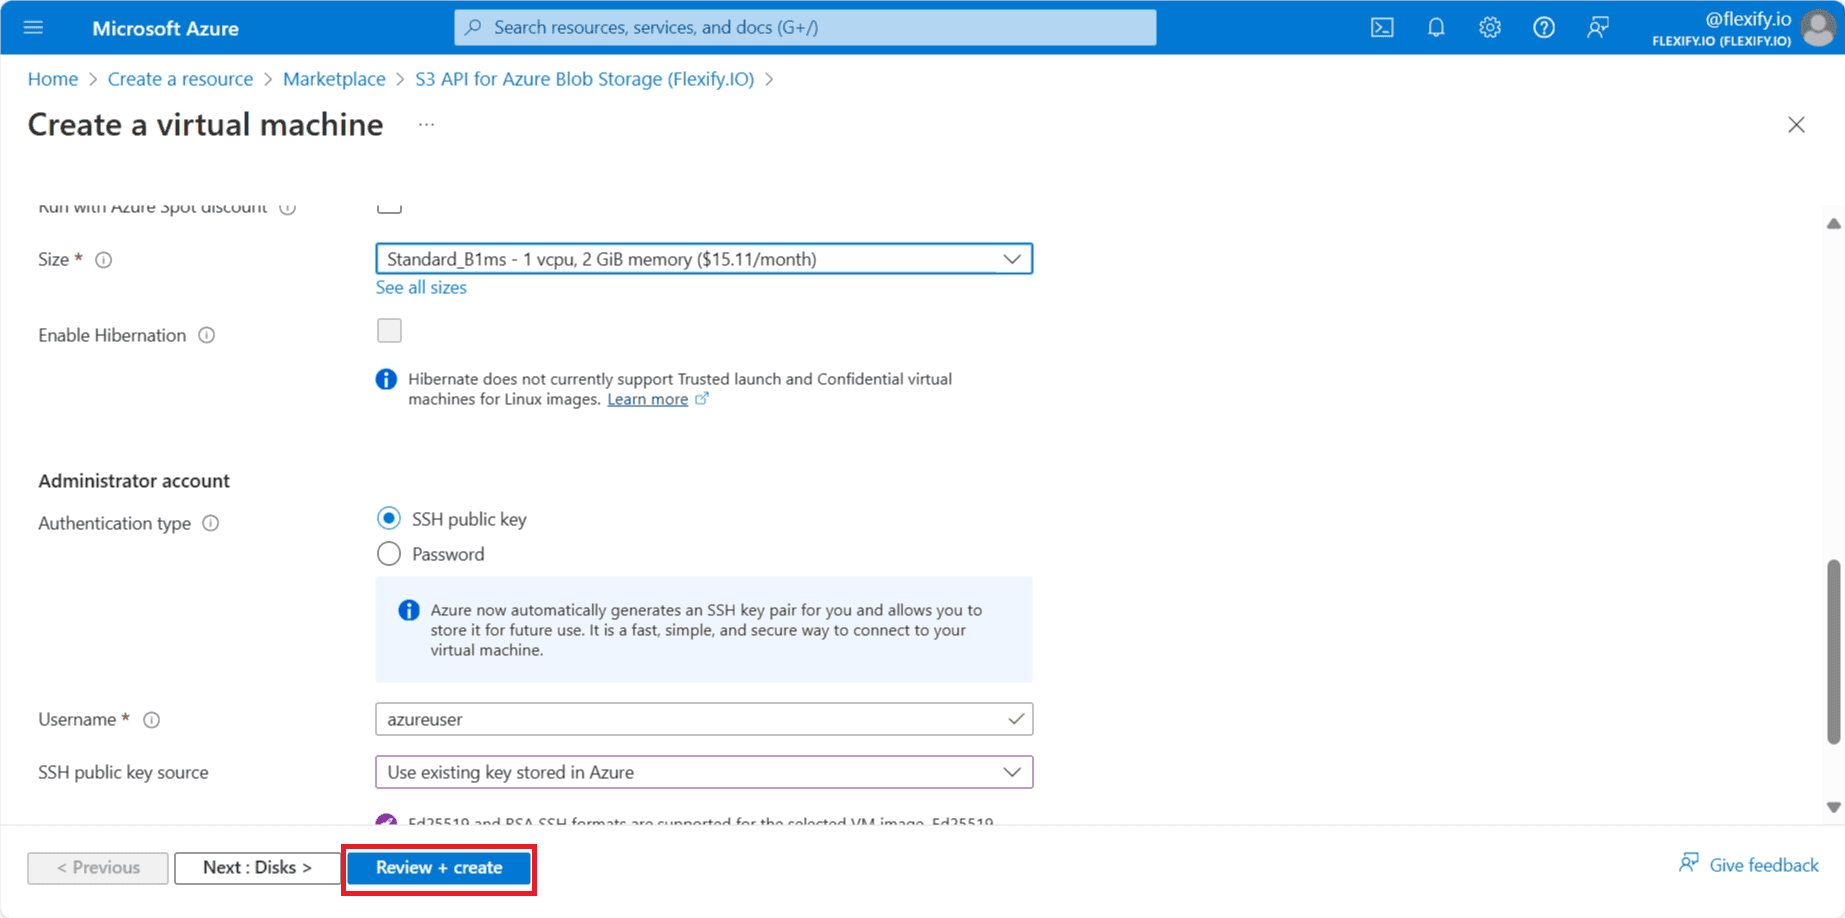
Specify VM name and other settings. We recommend selecting the region where you Azure Blob Storage account is located and VM size with at least 2 GB RAM. You can specify any username, password or SSH key - you will not need them now.
-
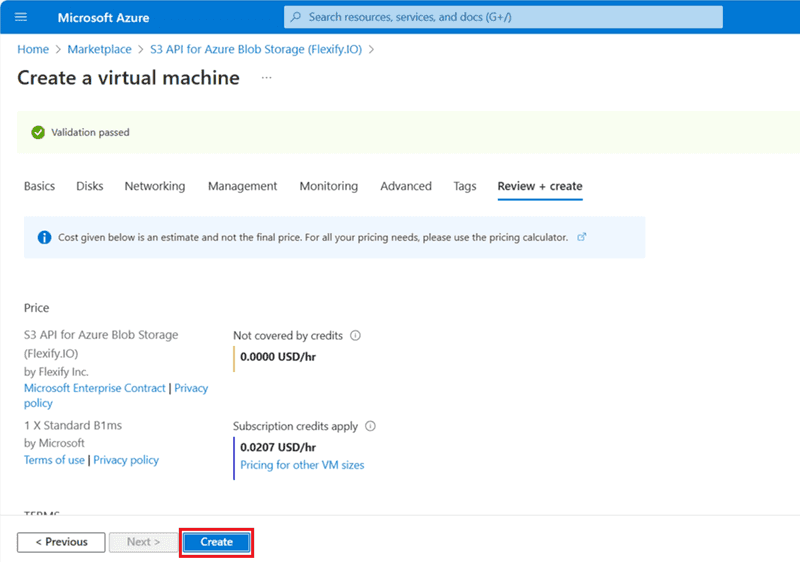
Click Review + create, confirm settings and click Create.
-
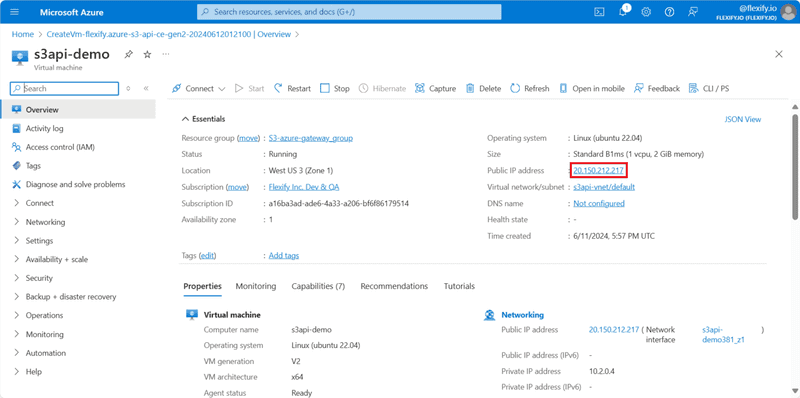
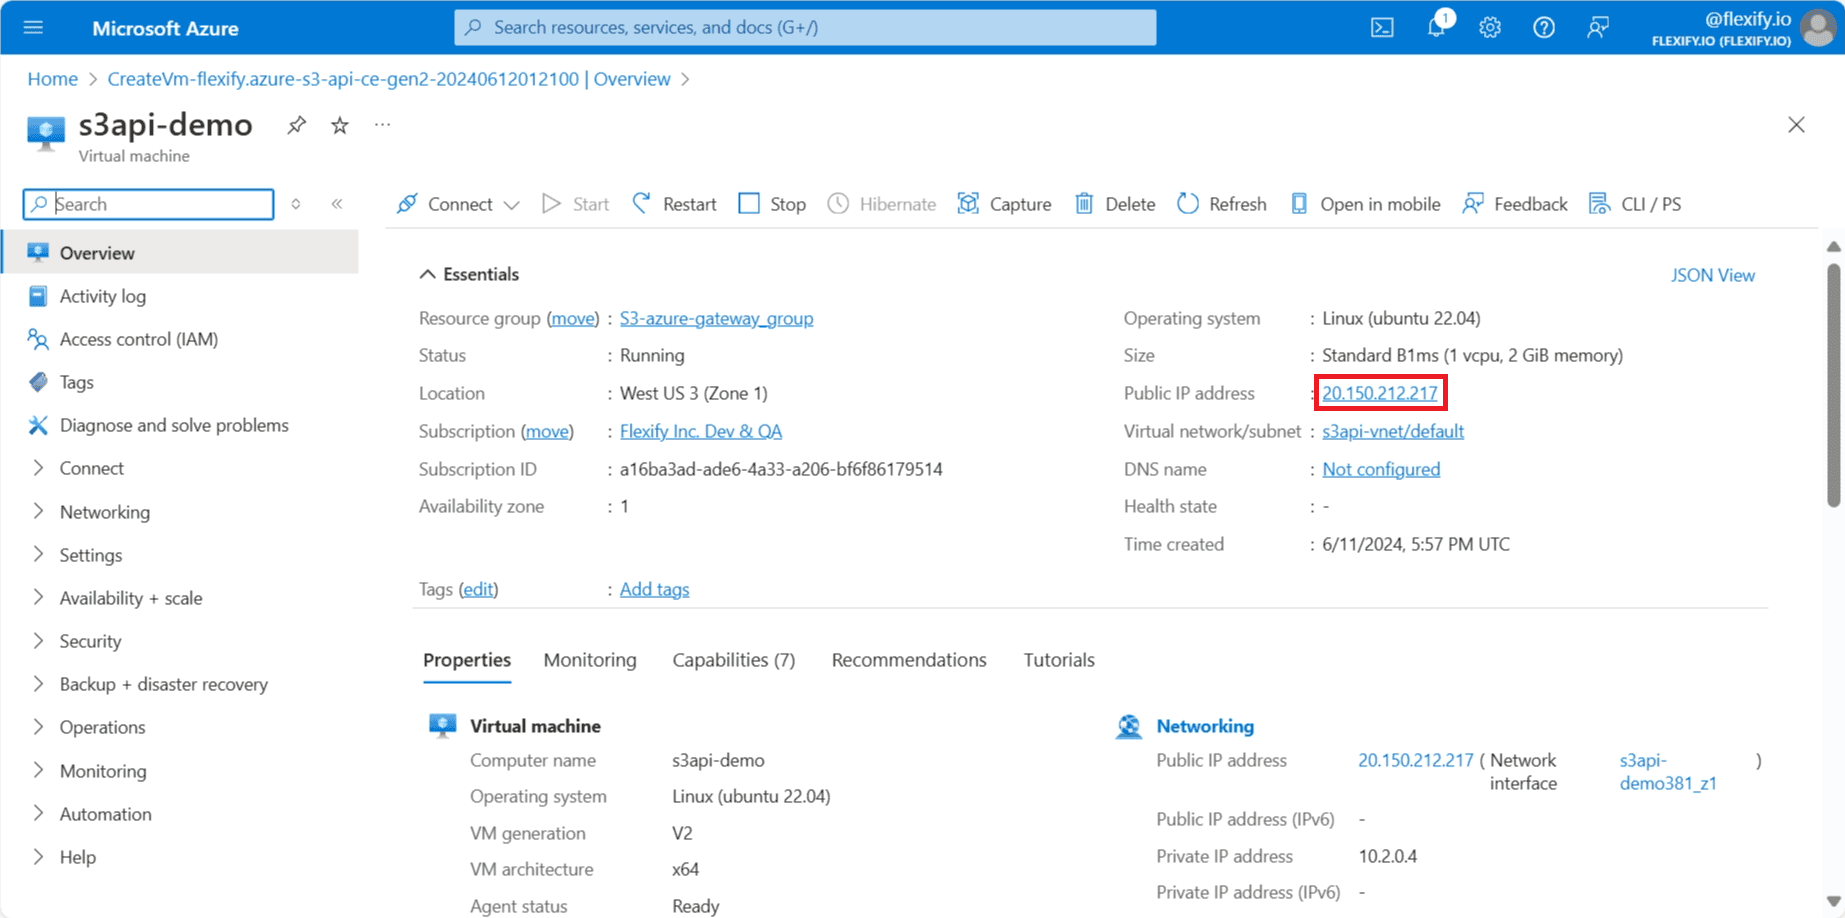
Once the VM is deployed – click Go to resource and copy IP address of the VM to clipboard.
-
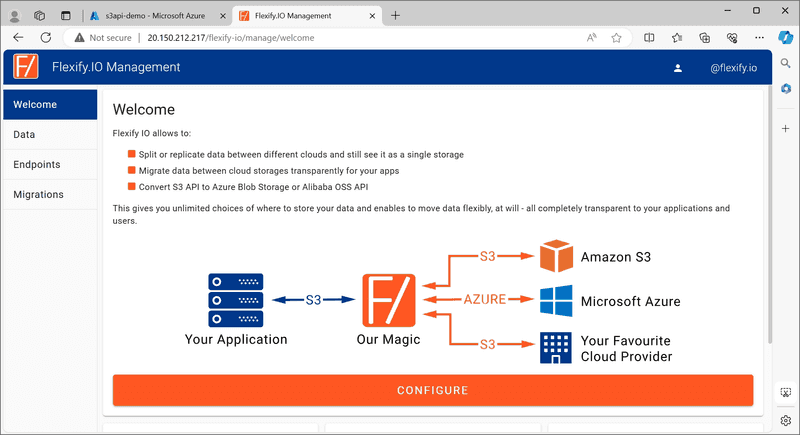
Open a new browser tab and paste the IP address. Flexify.IO management console will open.
-
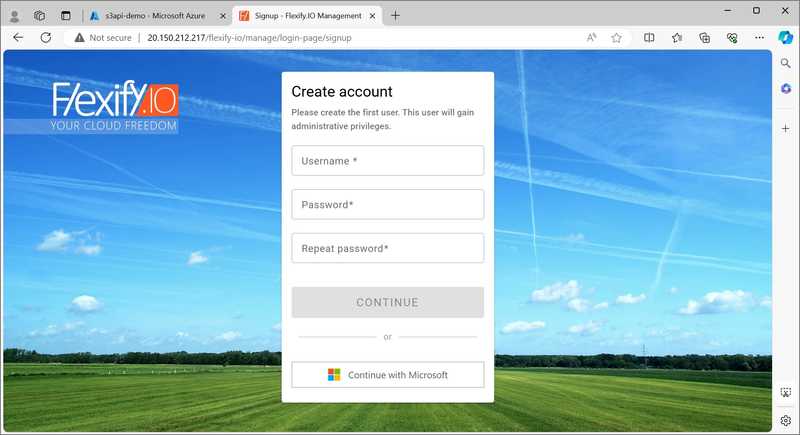
Type any new username and secure password, then click Continue. We will not know your credentials – they are local to this Flexify.IO installation.
-
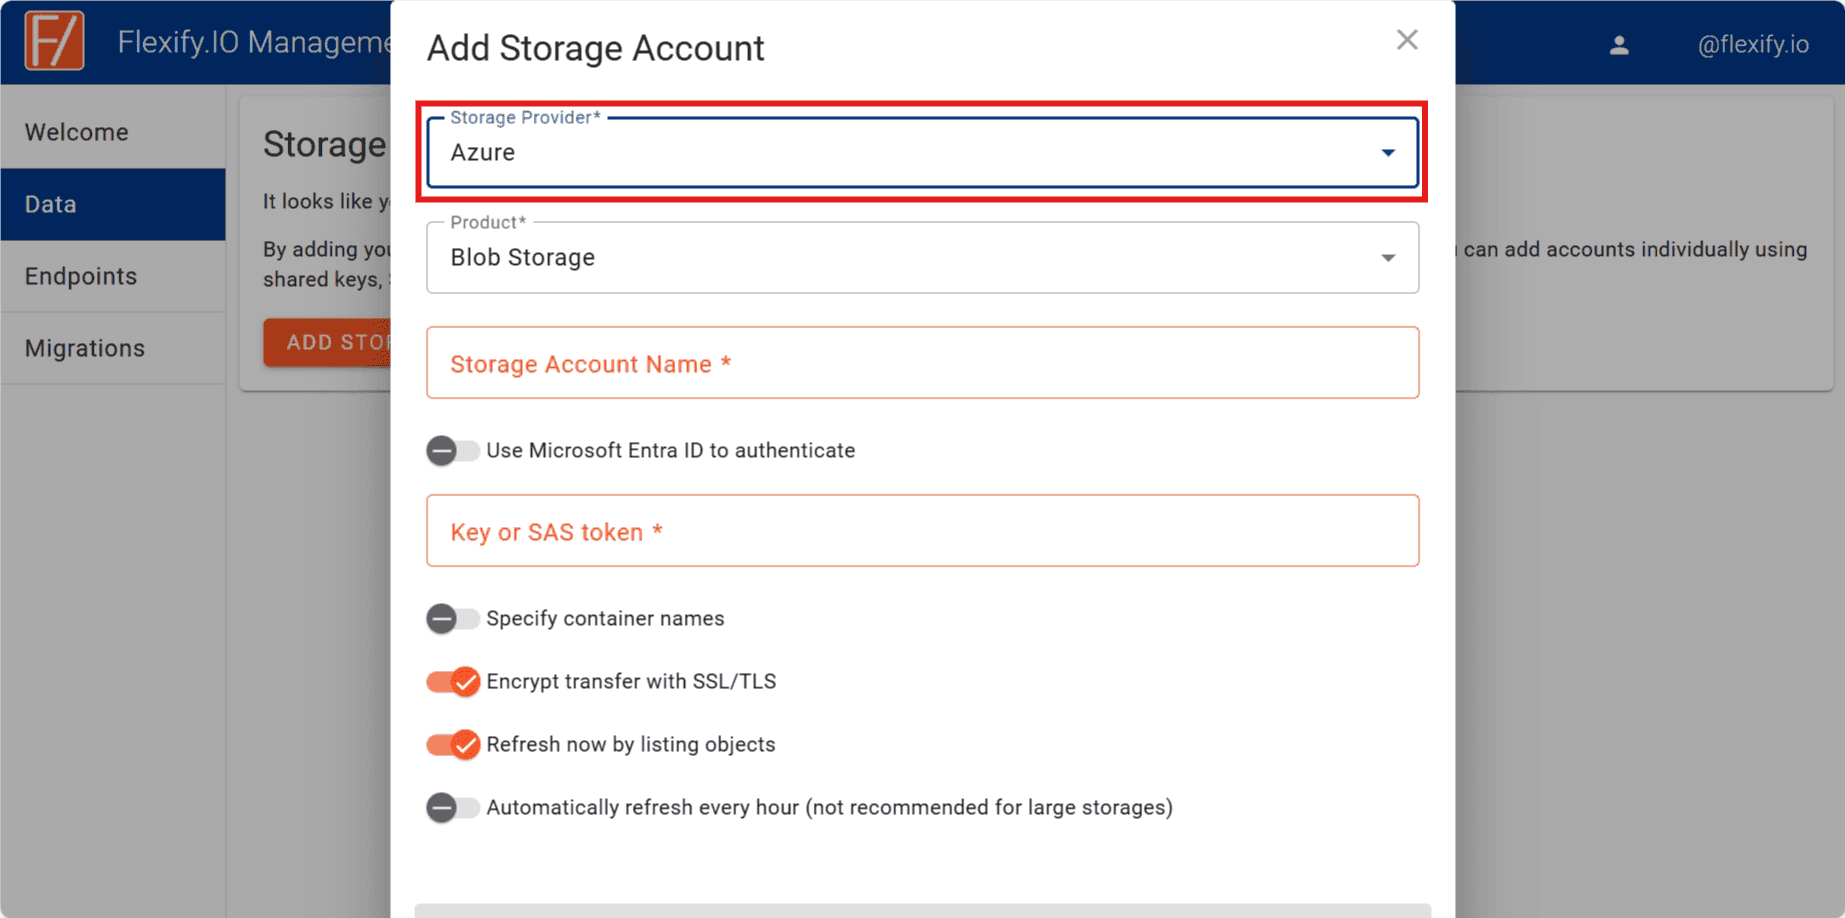
Switch to Data tab on the left, click Add Storage and select Azure in the list of Storage Providers.

-
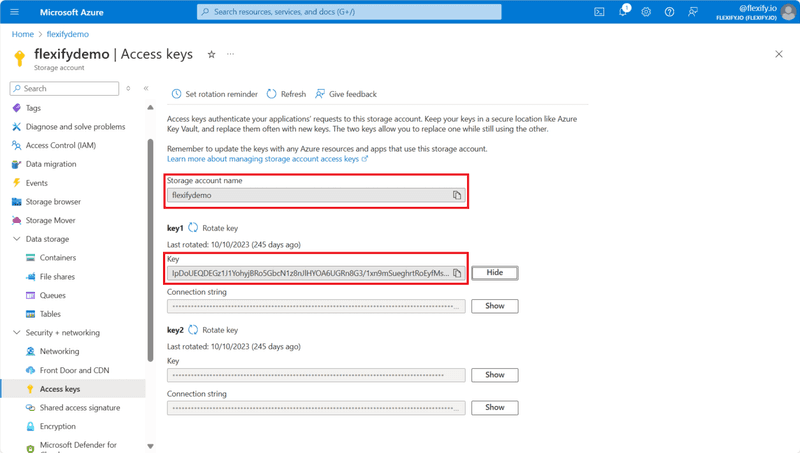
Go back to Azure portal and find your Azure Blob Storage Account. If you do not have a storage account yet – create one.
-
Open Access keys tab and copy-past storage account name and one of the keys to corresponding Flexify.IO fields. Be careful not to copy a connection string instead of a key.
-
Click Add Storage. The storage will be added.
-
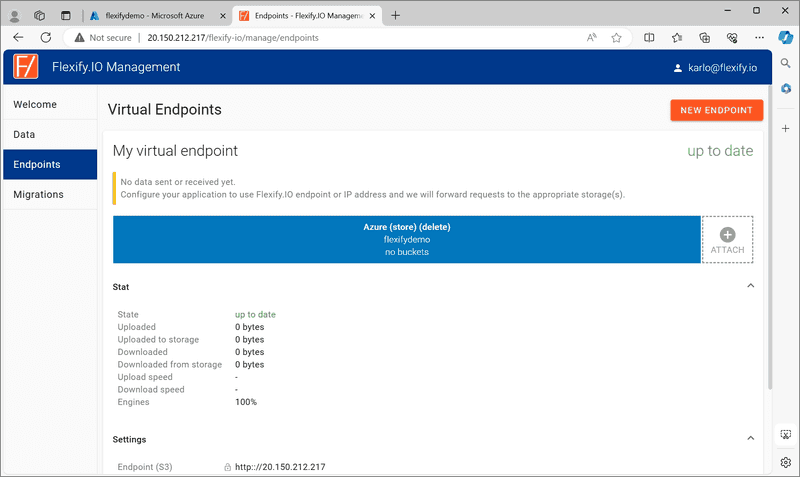
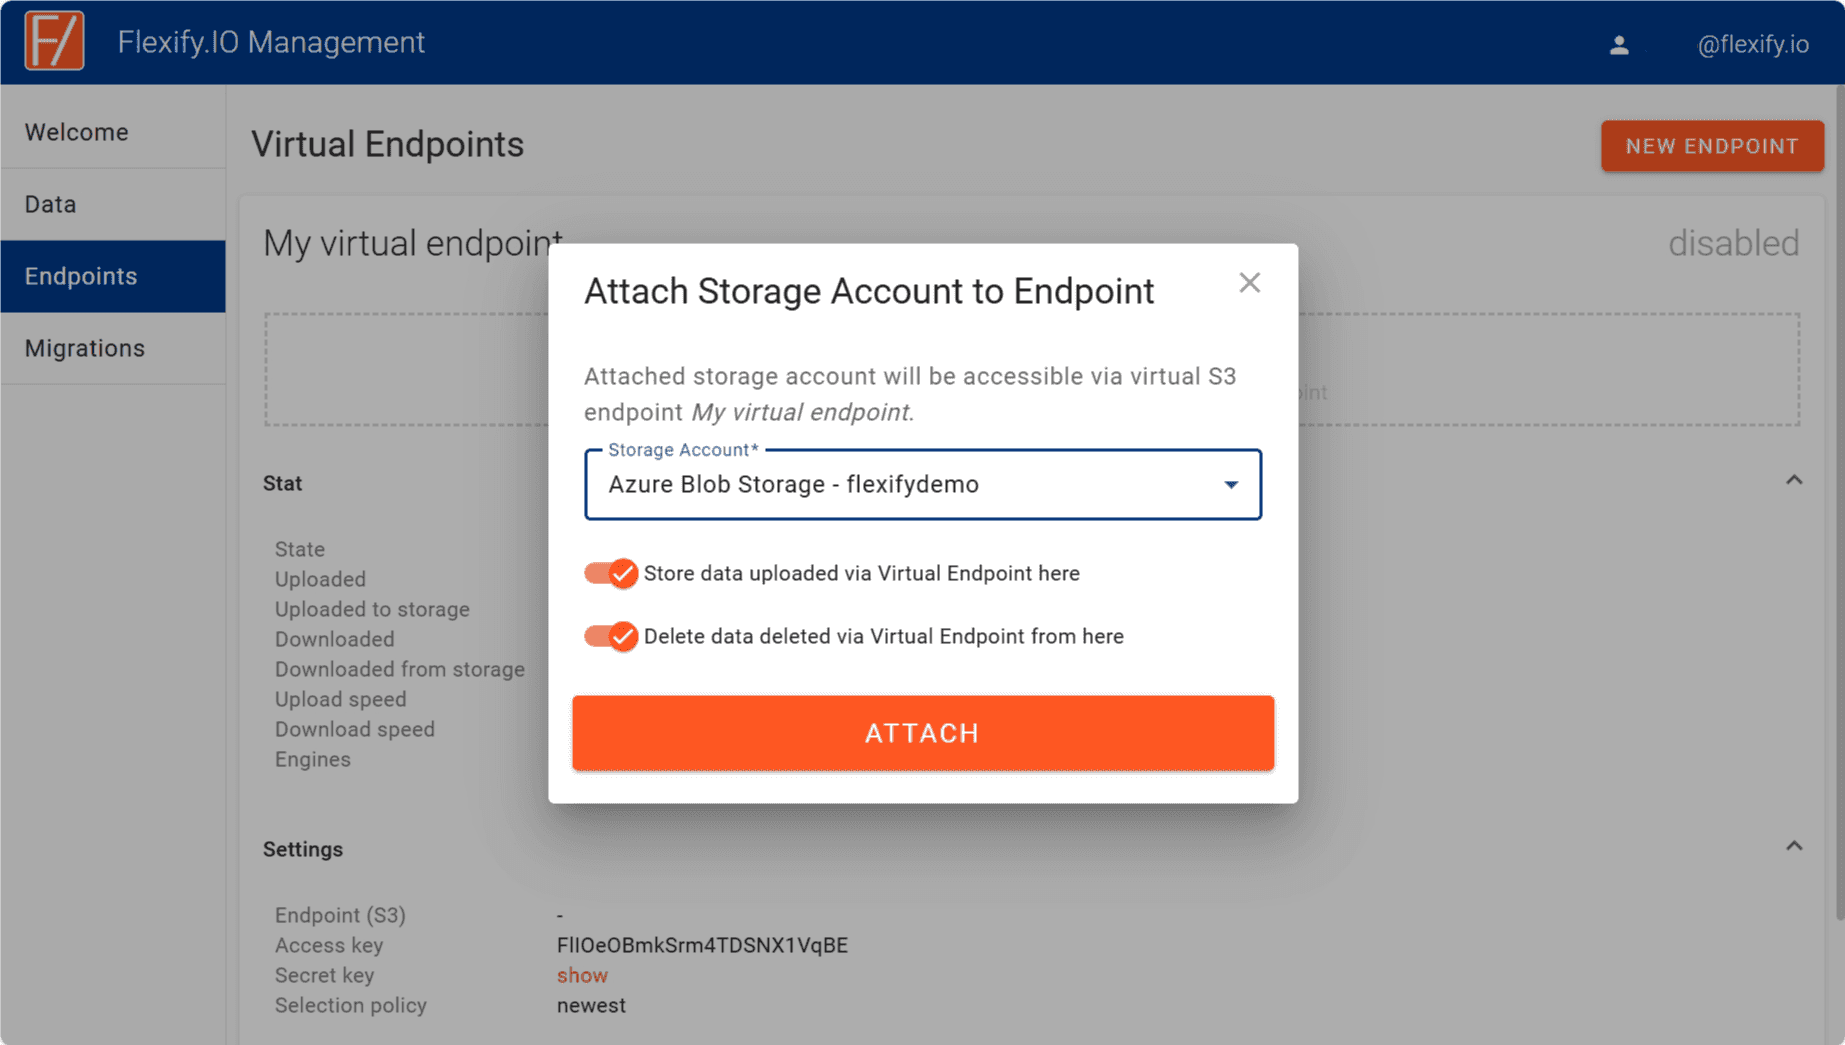
Switch to Endpoint tab, click New Endpoint, click + on the endpoint card and select newly added storage account from the list.

-
Click Attach to enable Flexify.IO virtual S3-compatible endpoint for you Azure storage account.
-
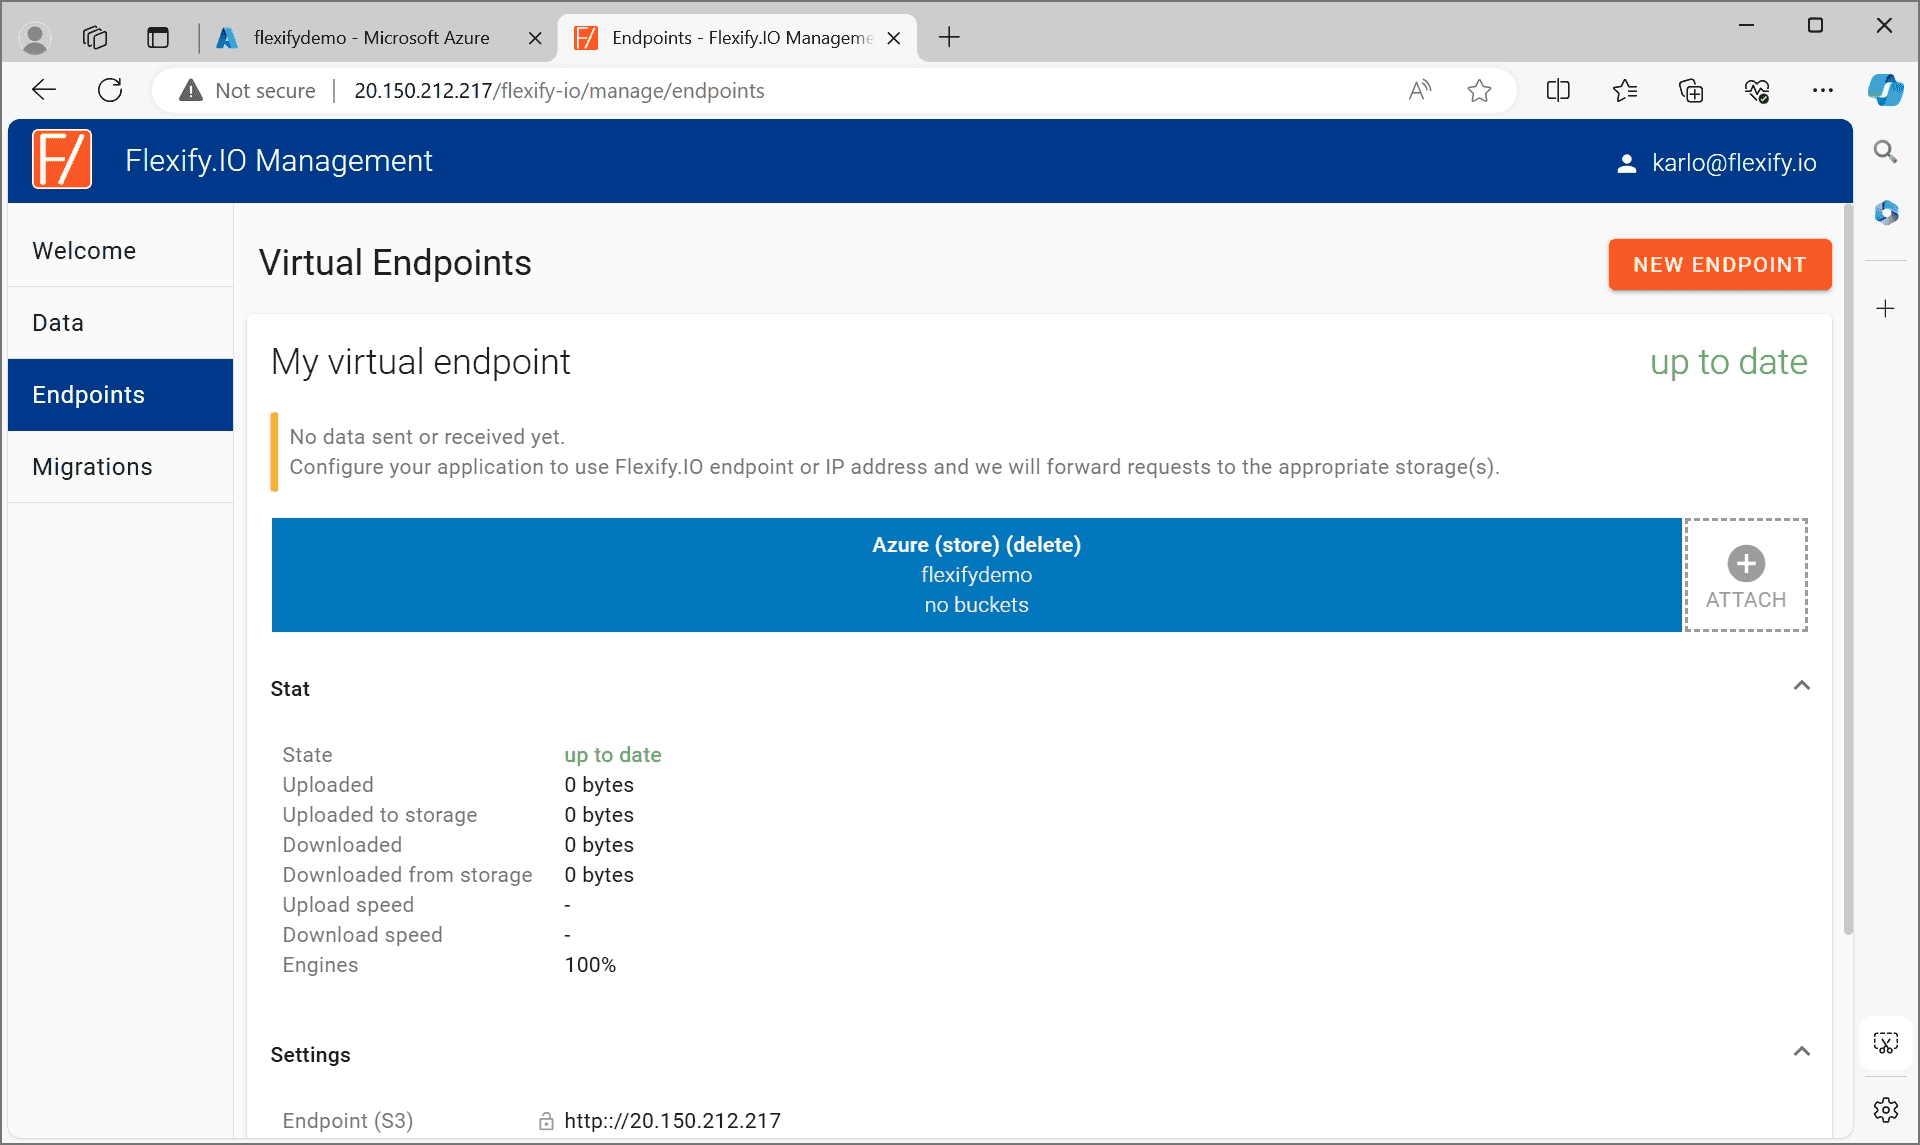
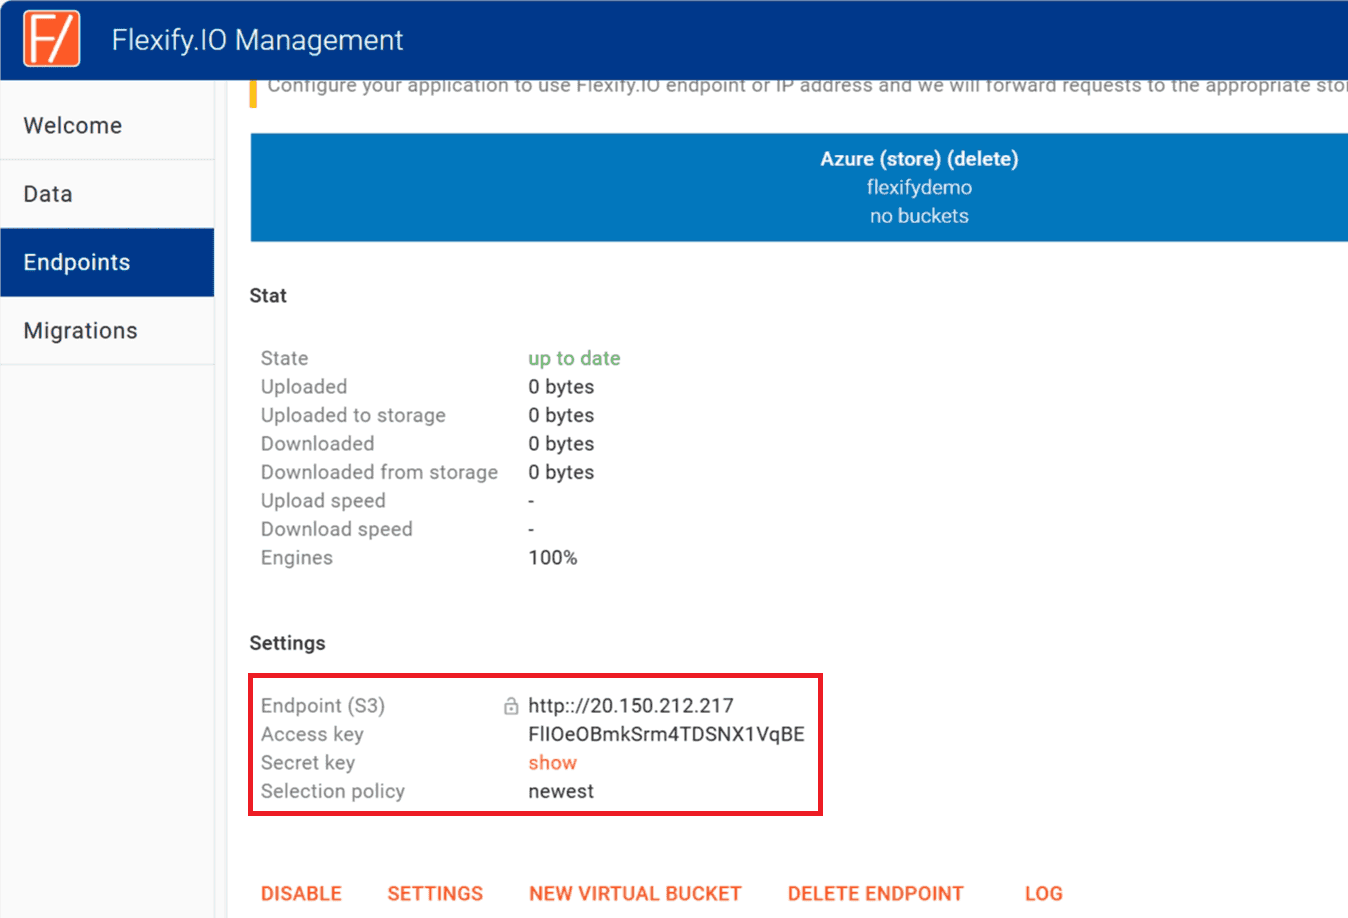
Now you can reconfigure your S3 application to work with Flexify.IO endpoint. Click Settings on the endpoint card to see endpoint IP (same as your VM IP address) address and S3 keys.

-
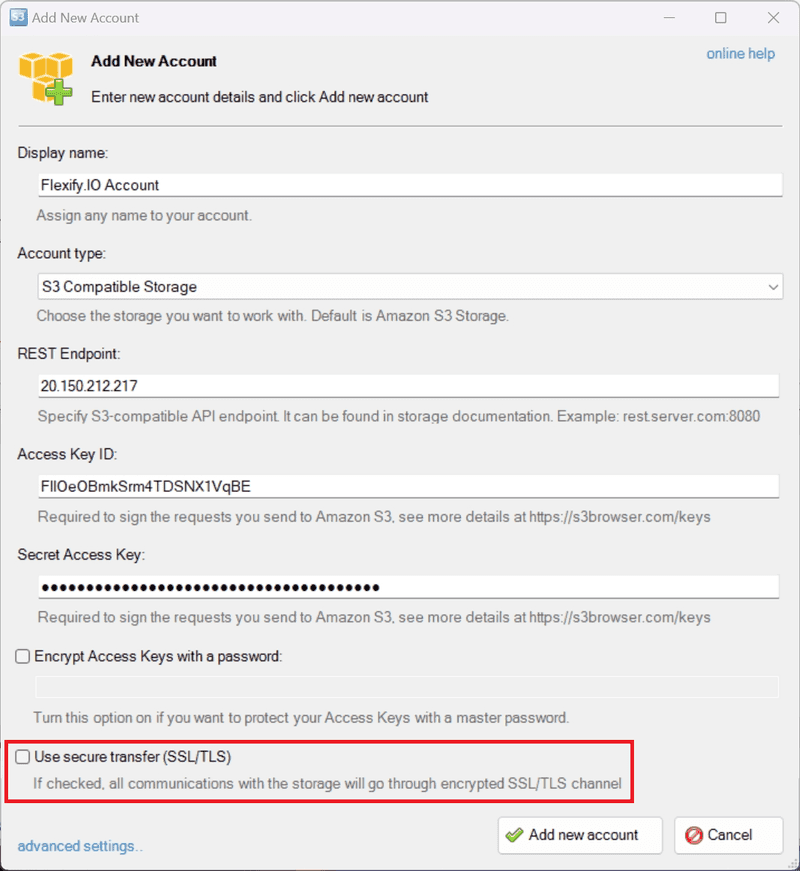
Now you can use S3-compatible endpoint with any S3-compatible application. For example, if you use S3 Browser, click Accounts -> Add New Account and copy-paste settings from Flexify.IO. You can use any signature version, but it’s important that you disable SSL because the virtual endpoint is not set up with SSL certificate yet.
-
Click Add new account
-
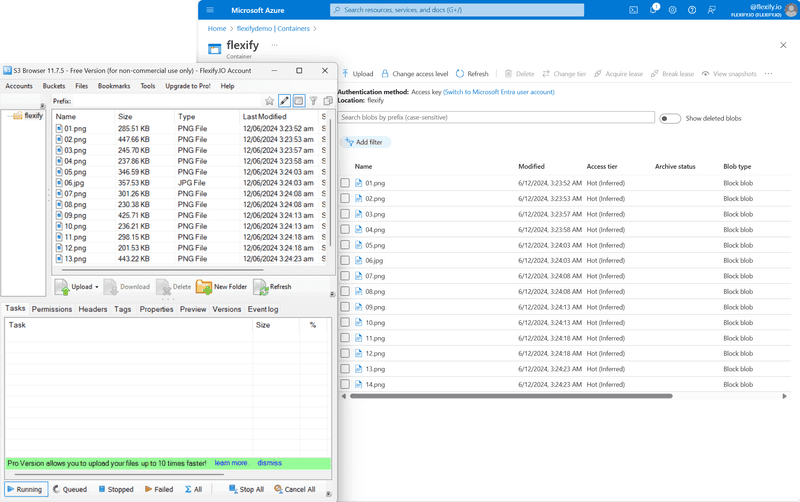
Click New Bucket on the left to create new S3 bucket that will be mapped to Azure container.
-
Now you can upload some objects to the newly created bucket, and the objects will be stored as Azure Blob, accessible via S3 API. You can see those objects in your Azure Storage Account directly.


Flexify.IO SaaS
Alternatively, you can create an account at https://manage.flexify.io and use the shared SaaS platform managed by us without a need to deploy and manage virtual machines.