
Overview
While migrating data between cloud storages may sound simple, a few things may complicate the process:
- How to make sure that your application can work with new storage's protocol, which might be not S3-compatible?
- How to ensure data consistency when your application keeps modifying data during migration?
- How to avoid downtime that is normally required to ensure data consistency?
- How to minimize traffic coming through your network and enable restarts in a case of failures?
Flexify.IO offers out-of-the box solutions to those problems:
- Flexify.IO converts storage protocols on-the-fly so that your application may continue to use old good S3 while accessing data, say, in Azure via Microsoft's protocol;
- Flexify.IO storage virtualization allows to assign a default storage so that your application can read data from all storages simultaneously, while changes are being written to your destination storage;
- Flexify.IO does not require any downtime for migration because your application still have access to all data is all your storages combined during the entire migration process;
- Flexify.IO is cloud-based service so that you do not need to direct migration traffic through your network while incremental migration only migrates data that is actually different allowing for simple start/stop with virtually no overhead.
Simple Data Migration
In the simplest scenario when you don't need to care about data consistency or downtime, migrating your data with Flexify.IO is just a matter of a few clicks.
-
Log in to Flexify.IO Management at manage.flexify.io
-
Go to Data tab
-
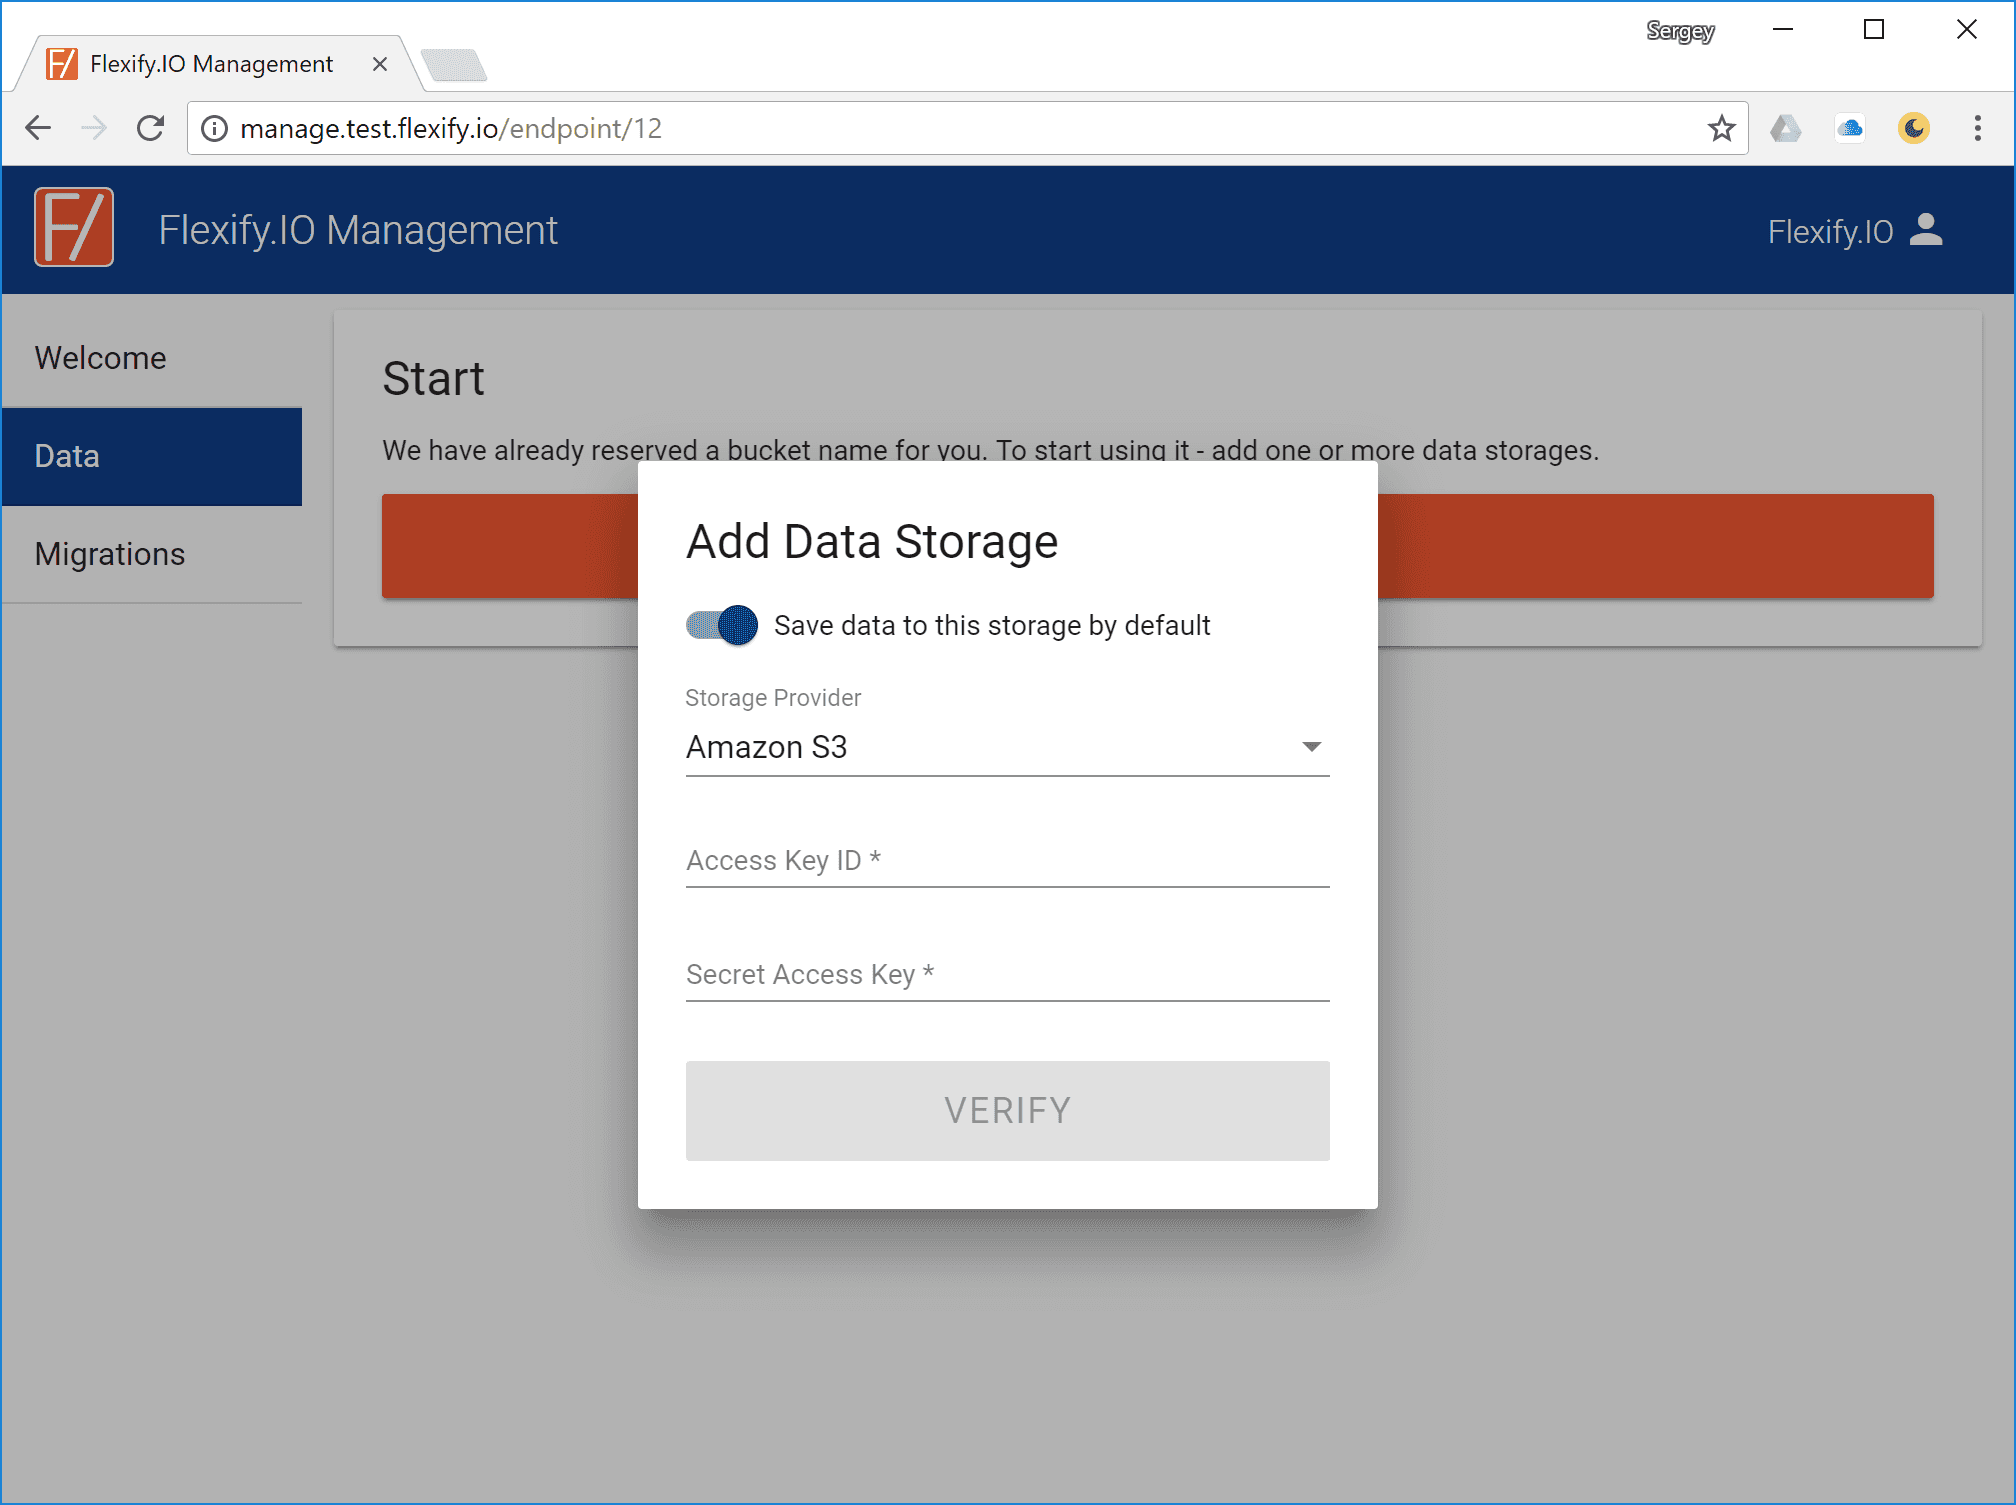
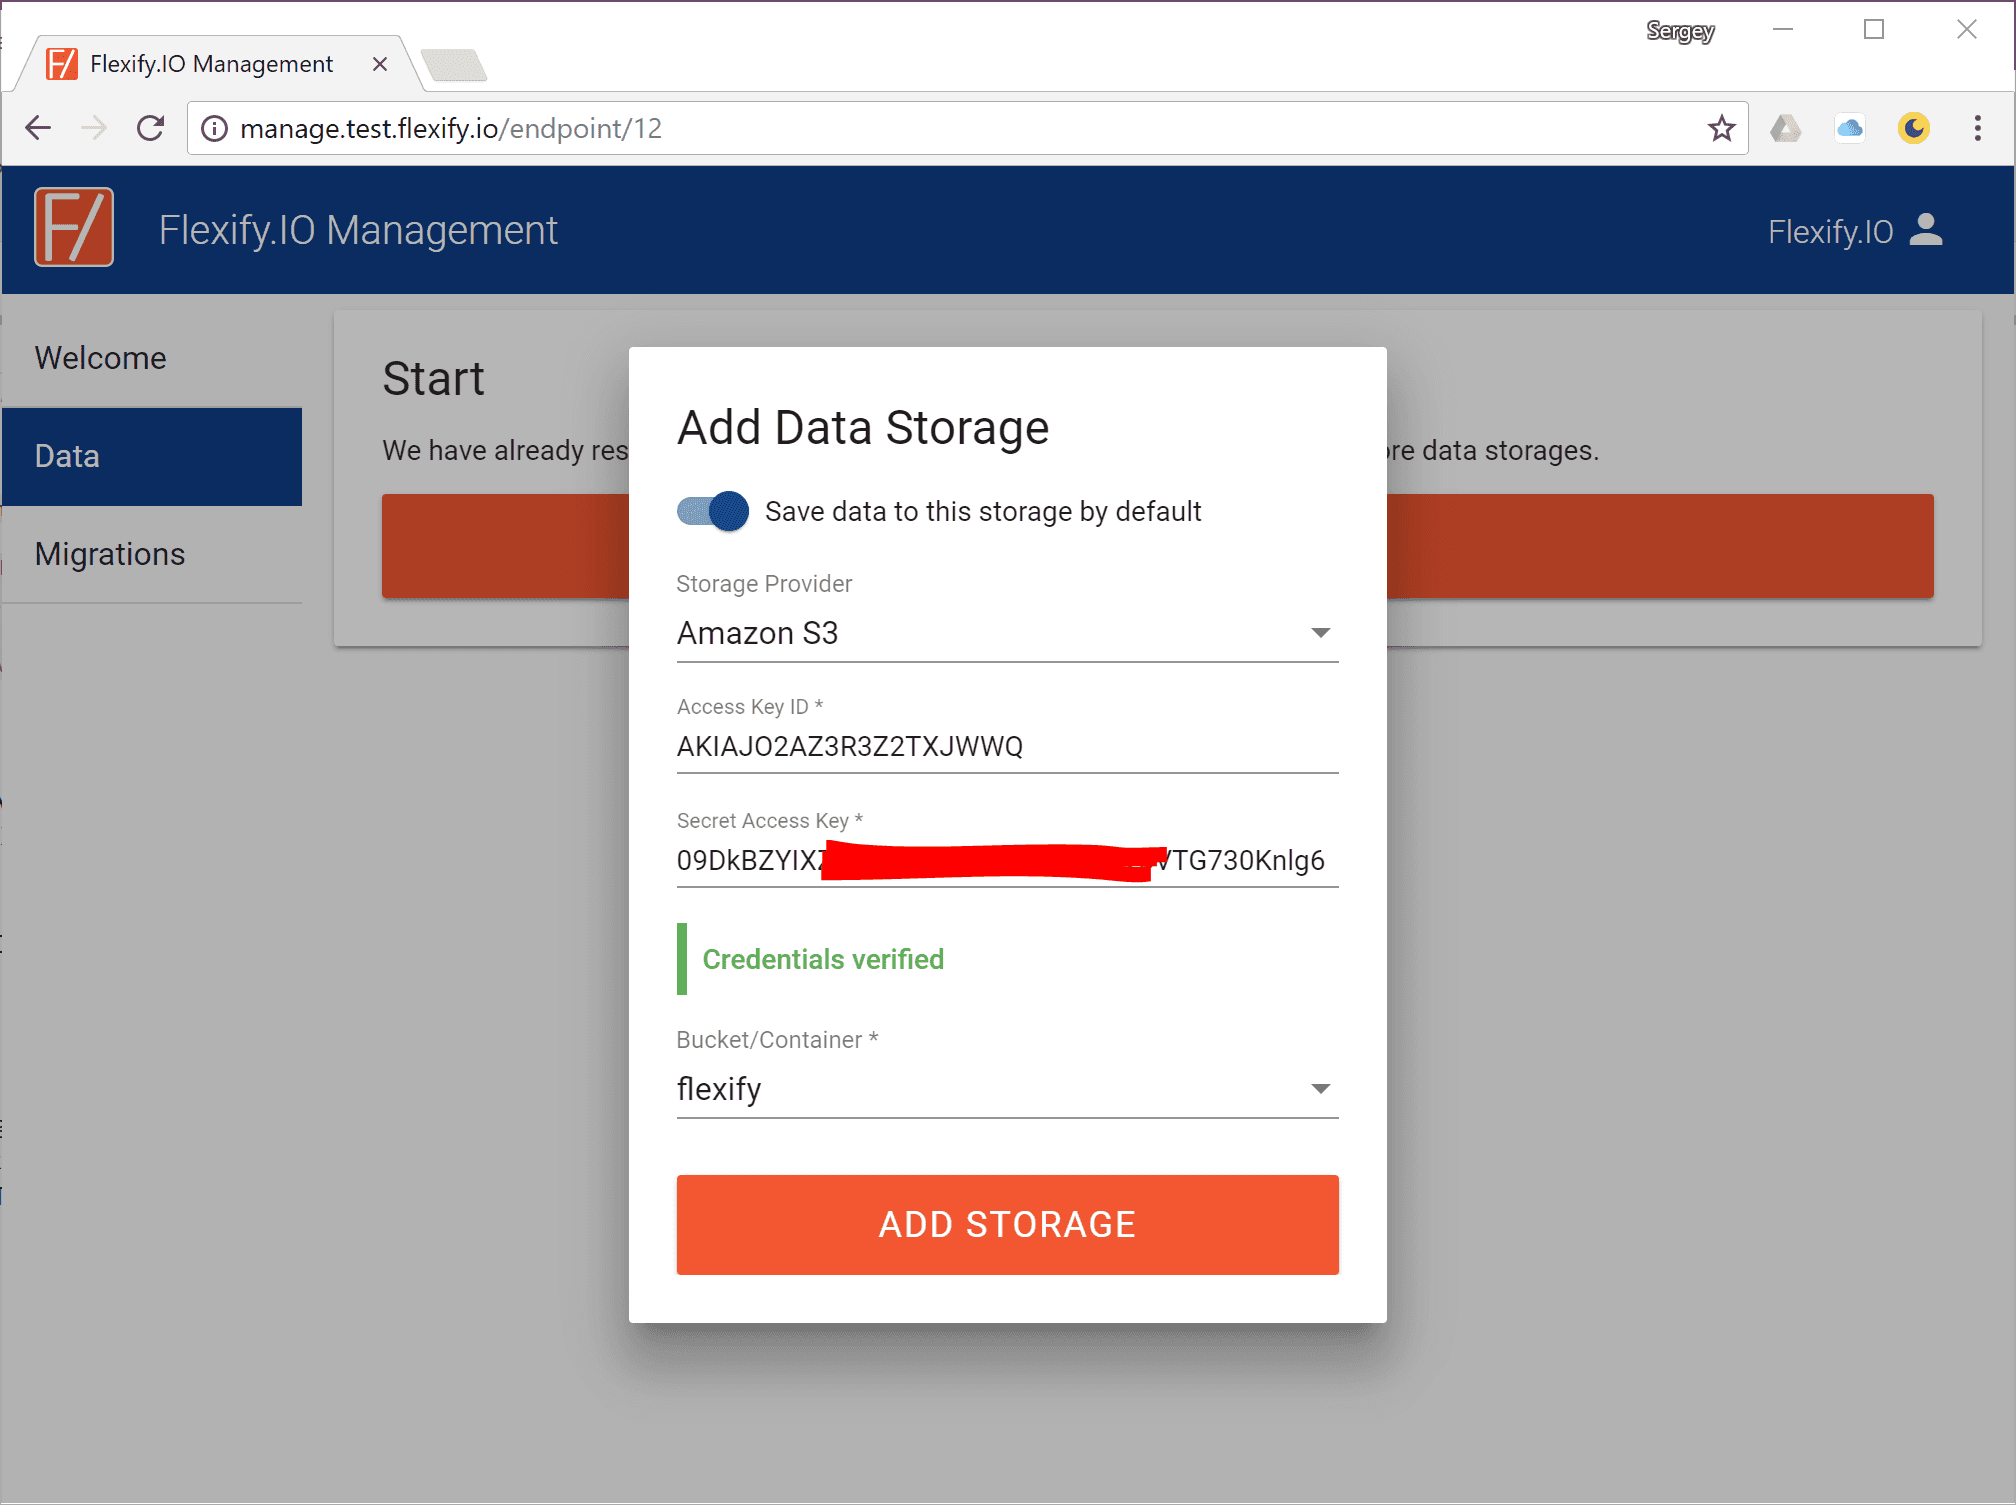
Click Add Storage to add a storage you want to migrate from

-
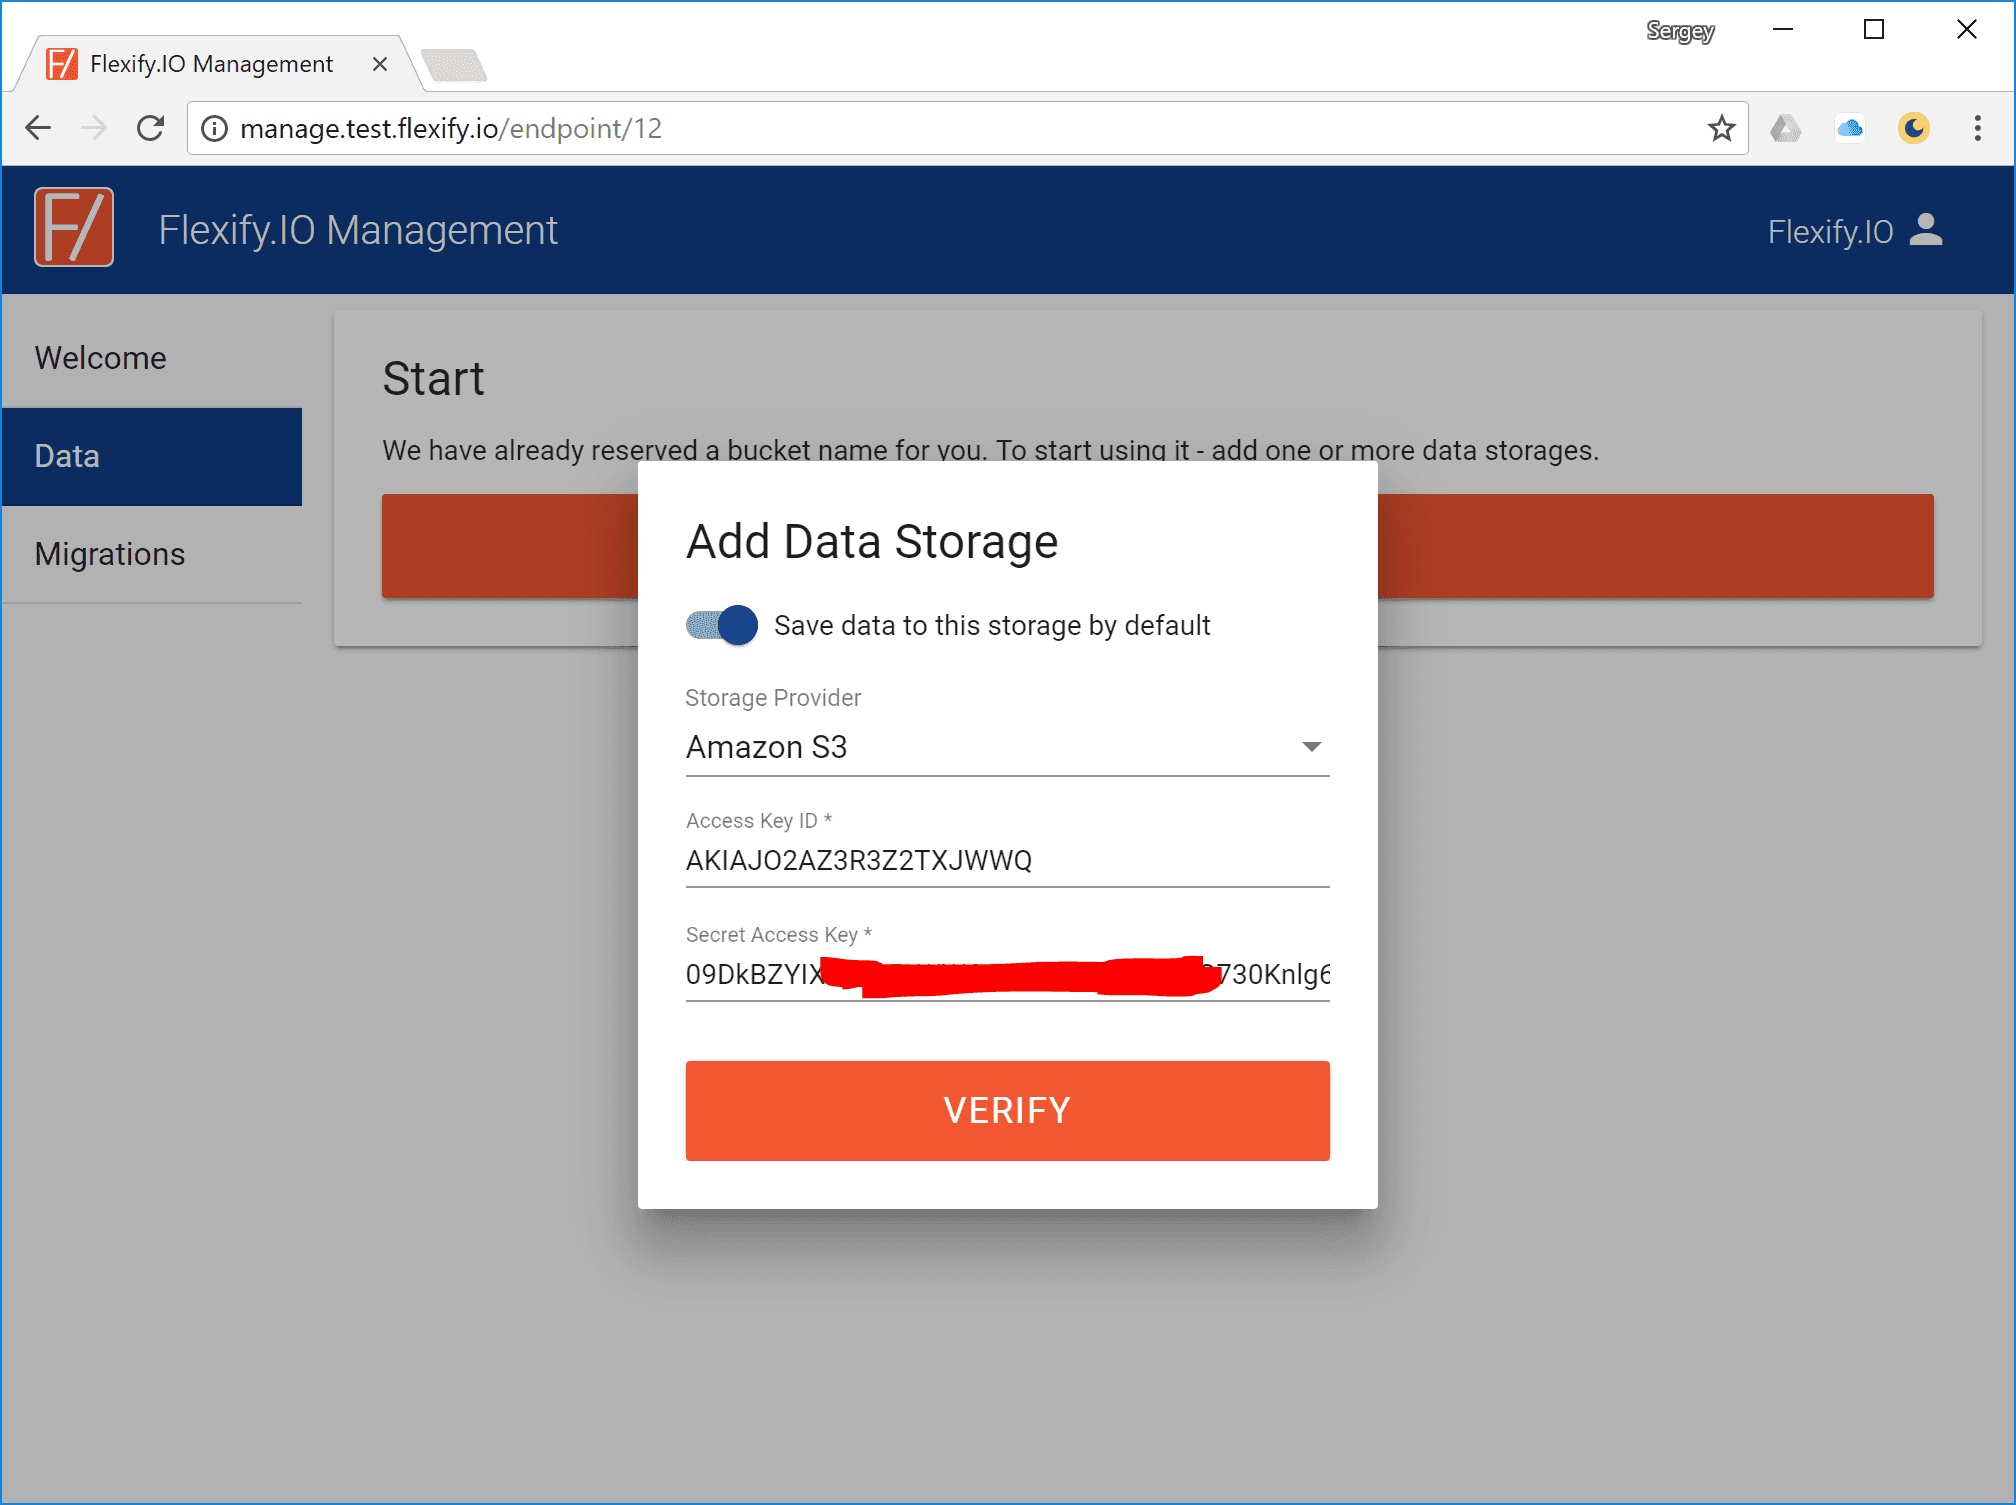
Select a storage provider (such as Amazon S3 or Microsoft Azure Blob Storage) and enter credentials
Note: You can get your credentials (keys) at your provider's management console:
- For Amazon Web Services: https://console.aws.amazon.com/iam/home#/security_credential
- For Microsoft Azure: https://portal.azure.com

-
Click Verify to verify your credentials and load a list of buckets
-
Choose a bucket

-
Click Add Storage to add the storage and close the dialog
-
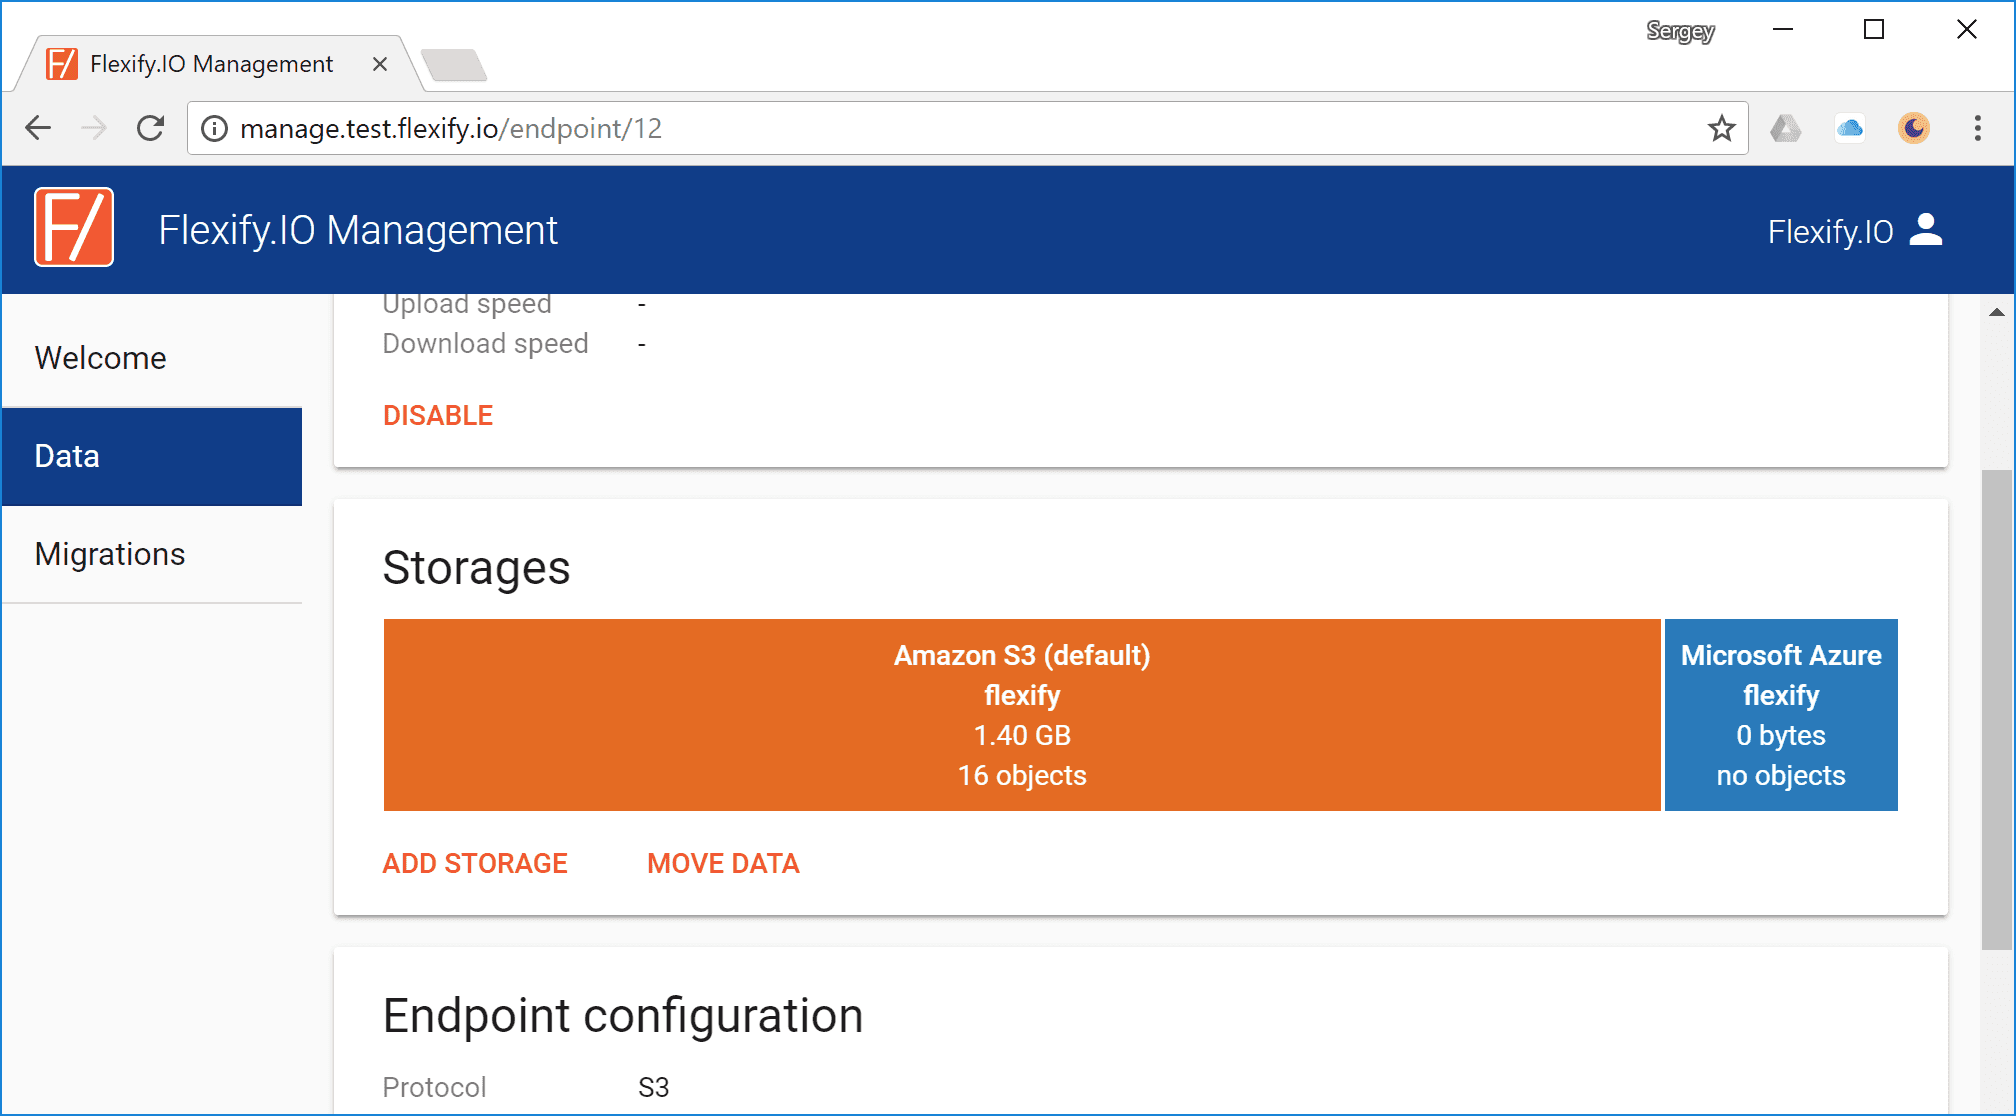
Add storage you want to migrate to by clicking Add Storage again and repeating the previous steps
-
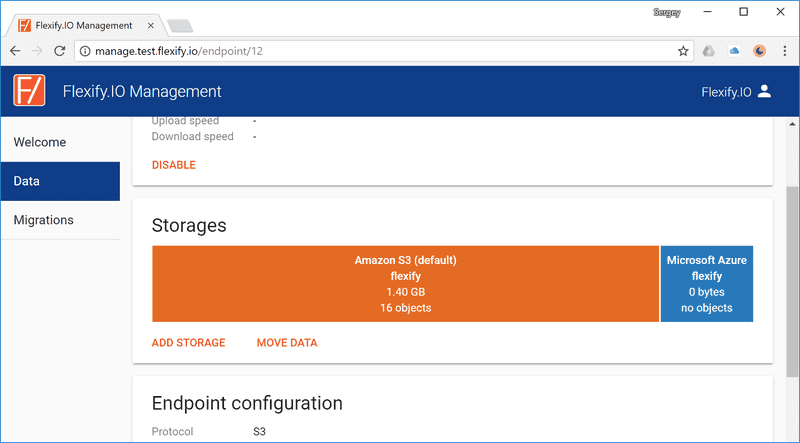
Click Move Data to open the Migration Wizard and select the storages you just added in From and To fields
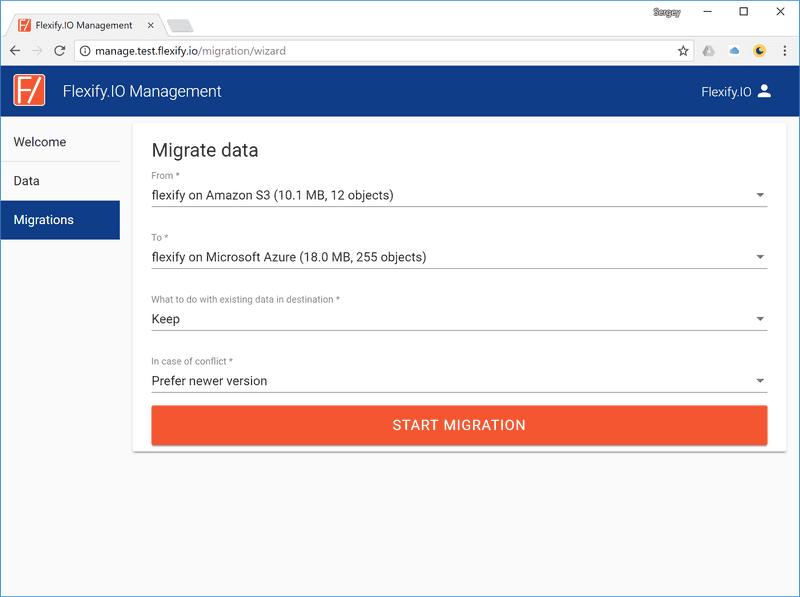
-
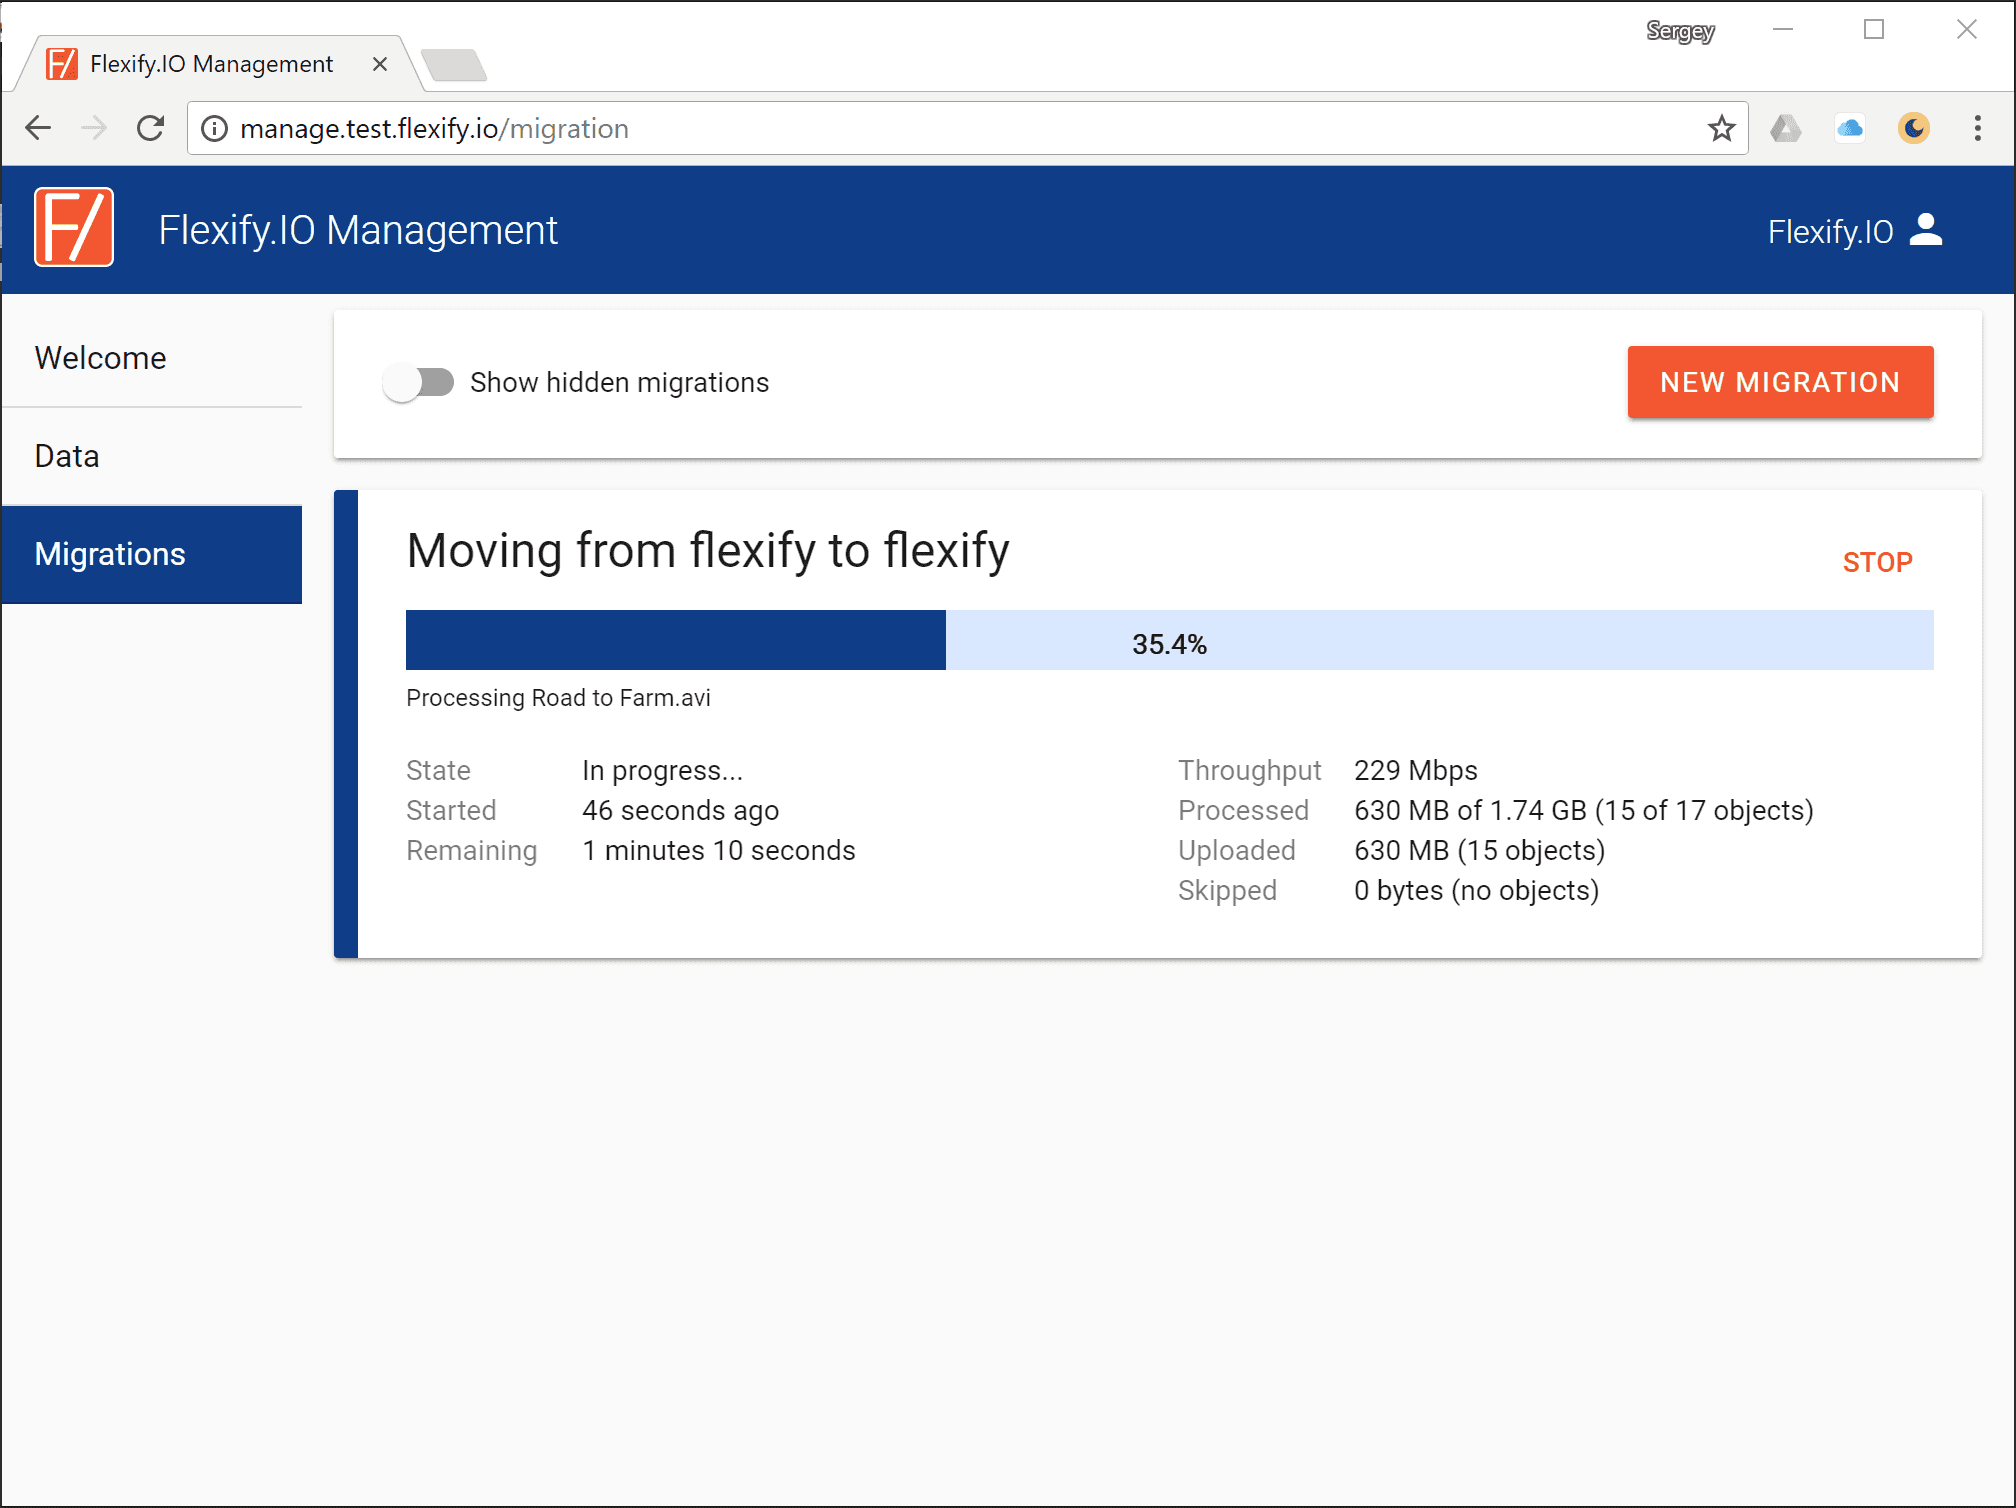
Click Start Migration and see migration progress


Migration with No Downtime
Flexify.IO enables you to avoid downtime during migration by virtualizing your storages and presenting all your data to your application in a single, combined bucket.
This way, no matter what data is already migration and what is not, your application always sees all the objects.
By completing the previous section, you have already configured Flexify.IO for storage virtualization! All you need to do now it tell your application to send data requests to Flexify.IO.
-
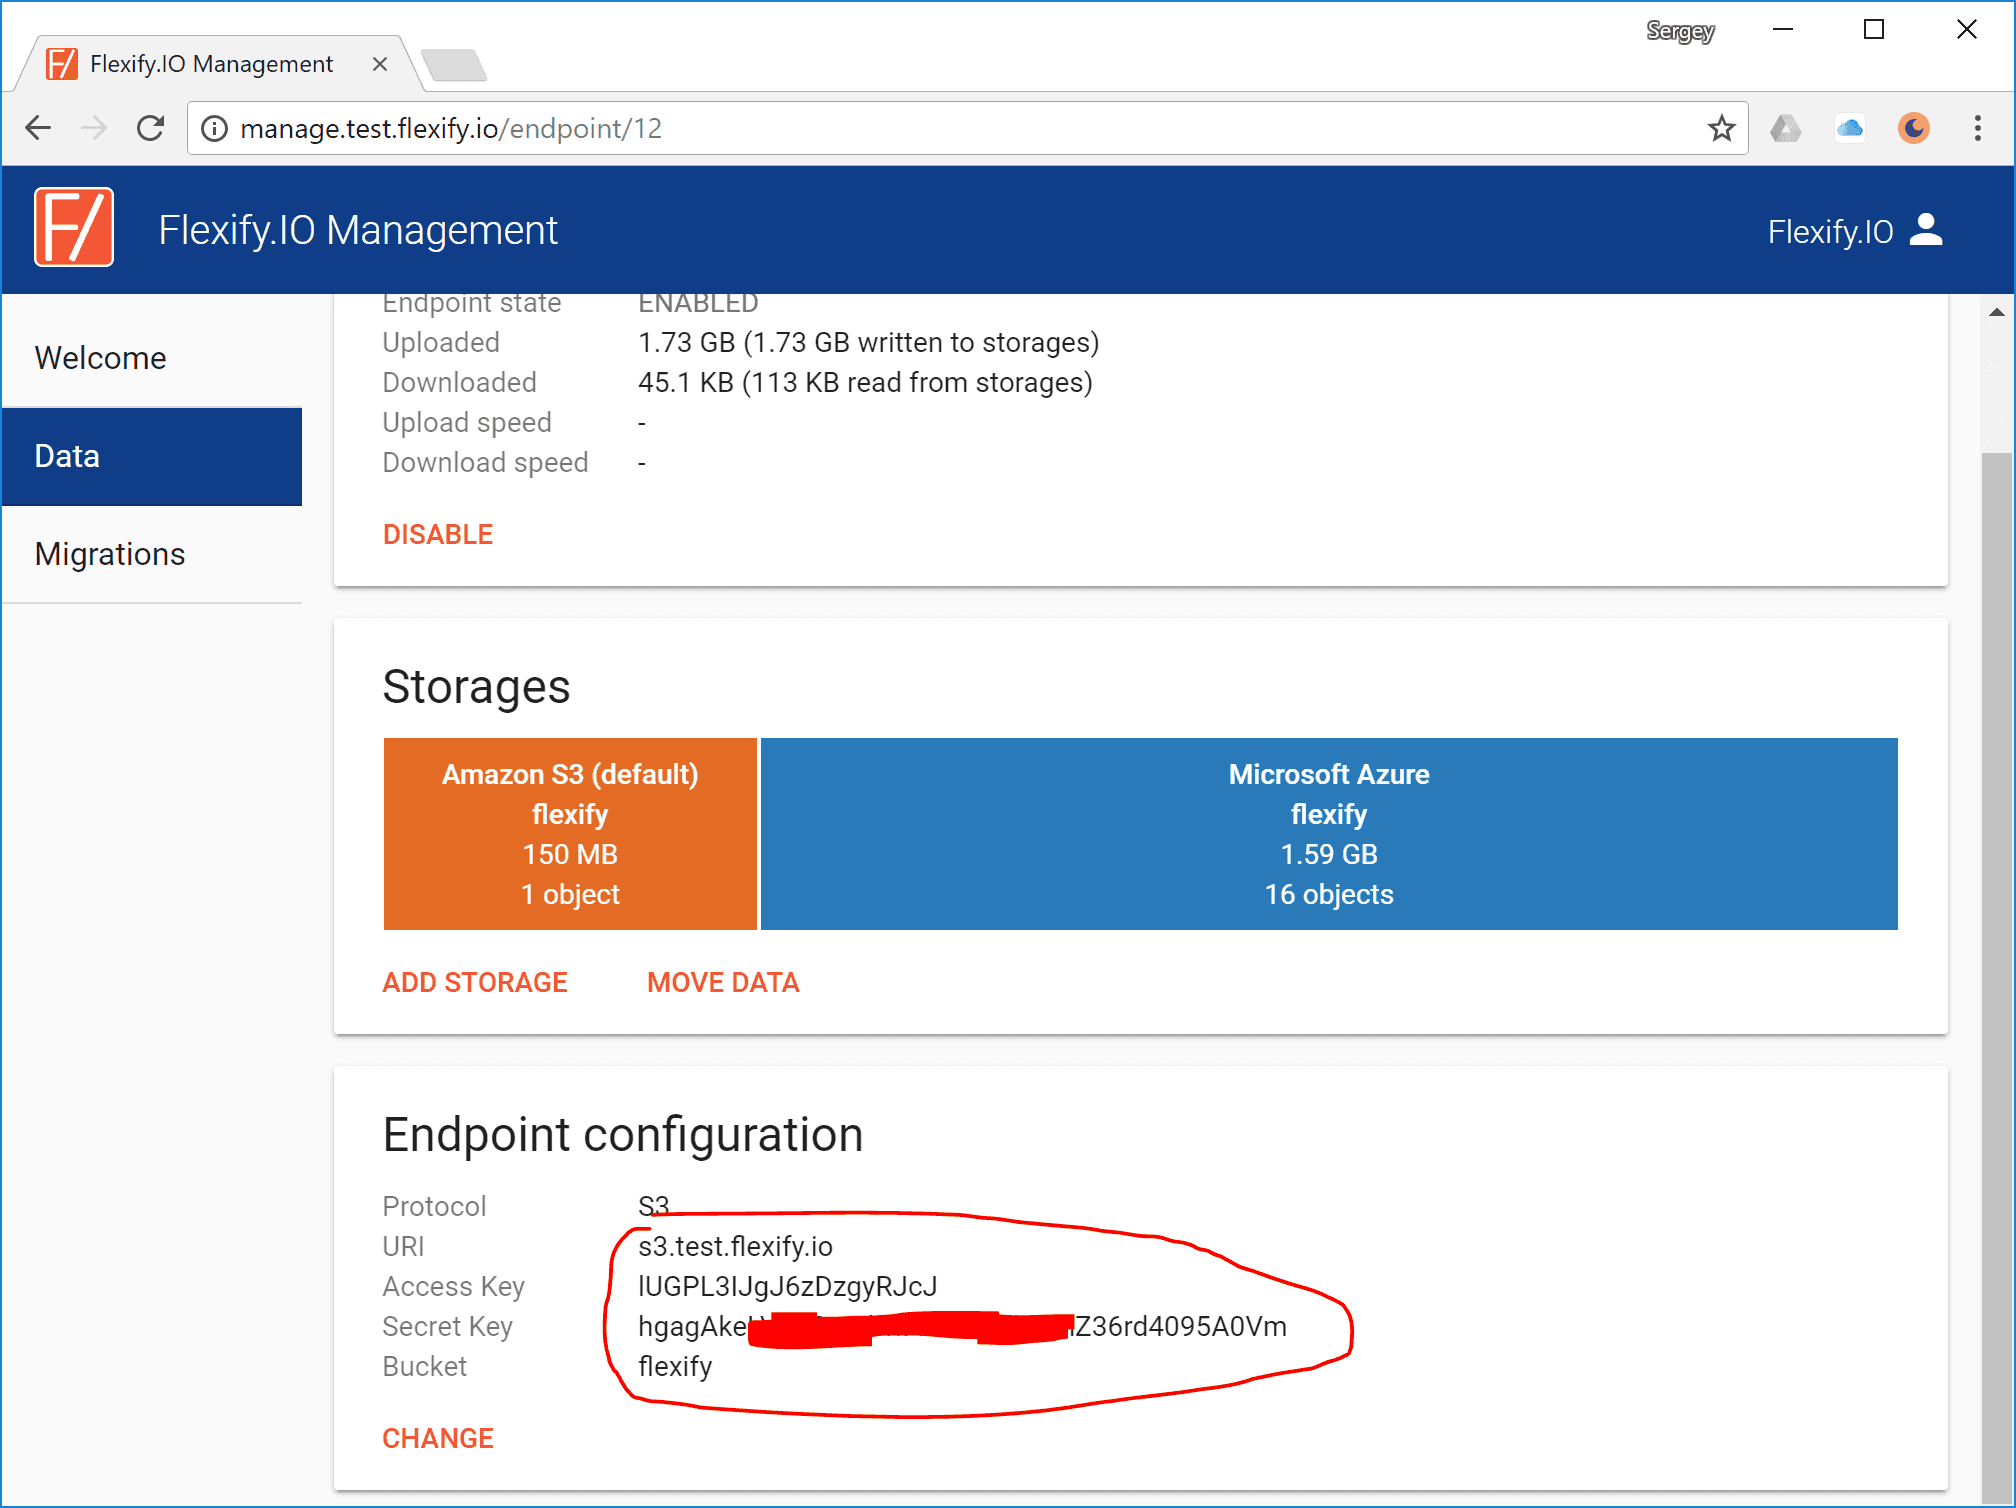
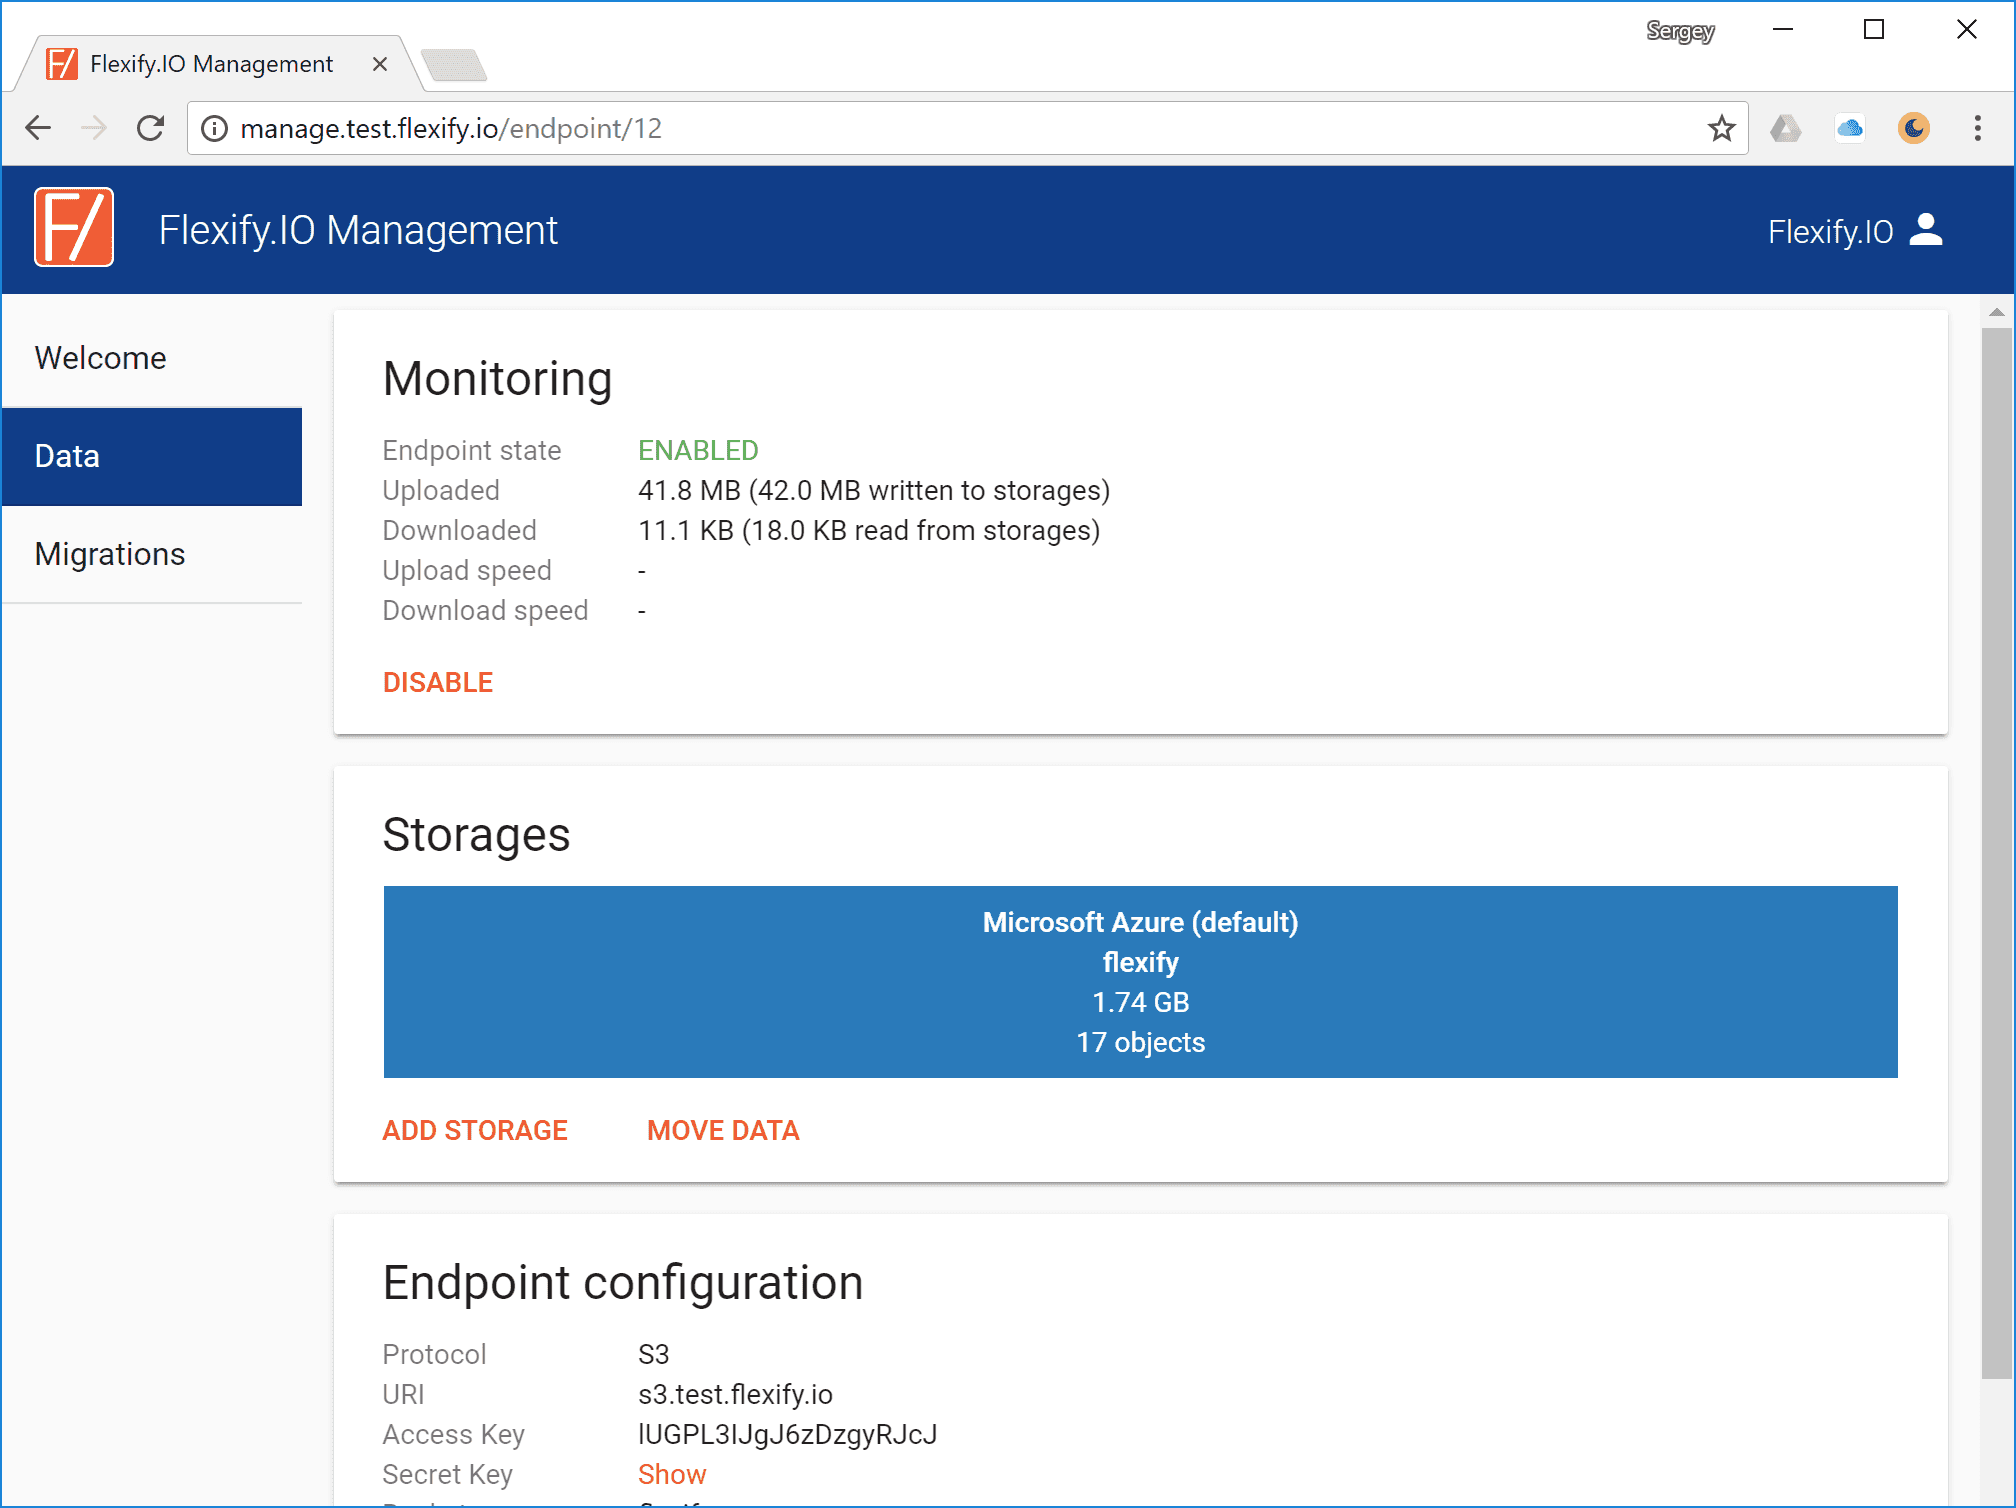
Configure your application to use your Flexify.IO endpoint and keys. This info is displayed in the Data tab as well (you will need to click Show to display your Secret Key).
Hint: see How to Configure Your Application for Flexify.IO for details on how to change S3 endpoint that your application is using.

-
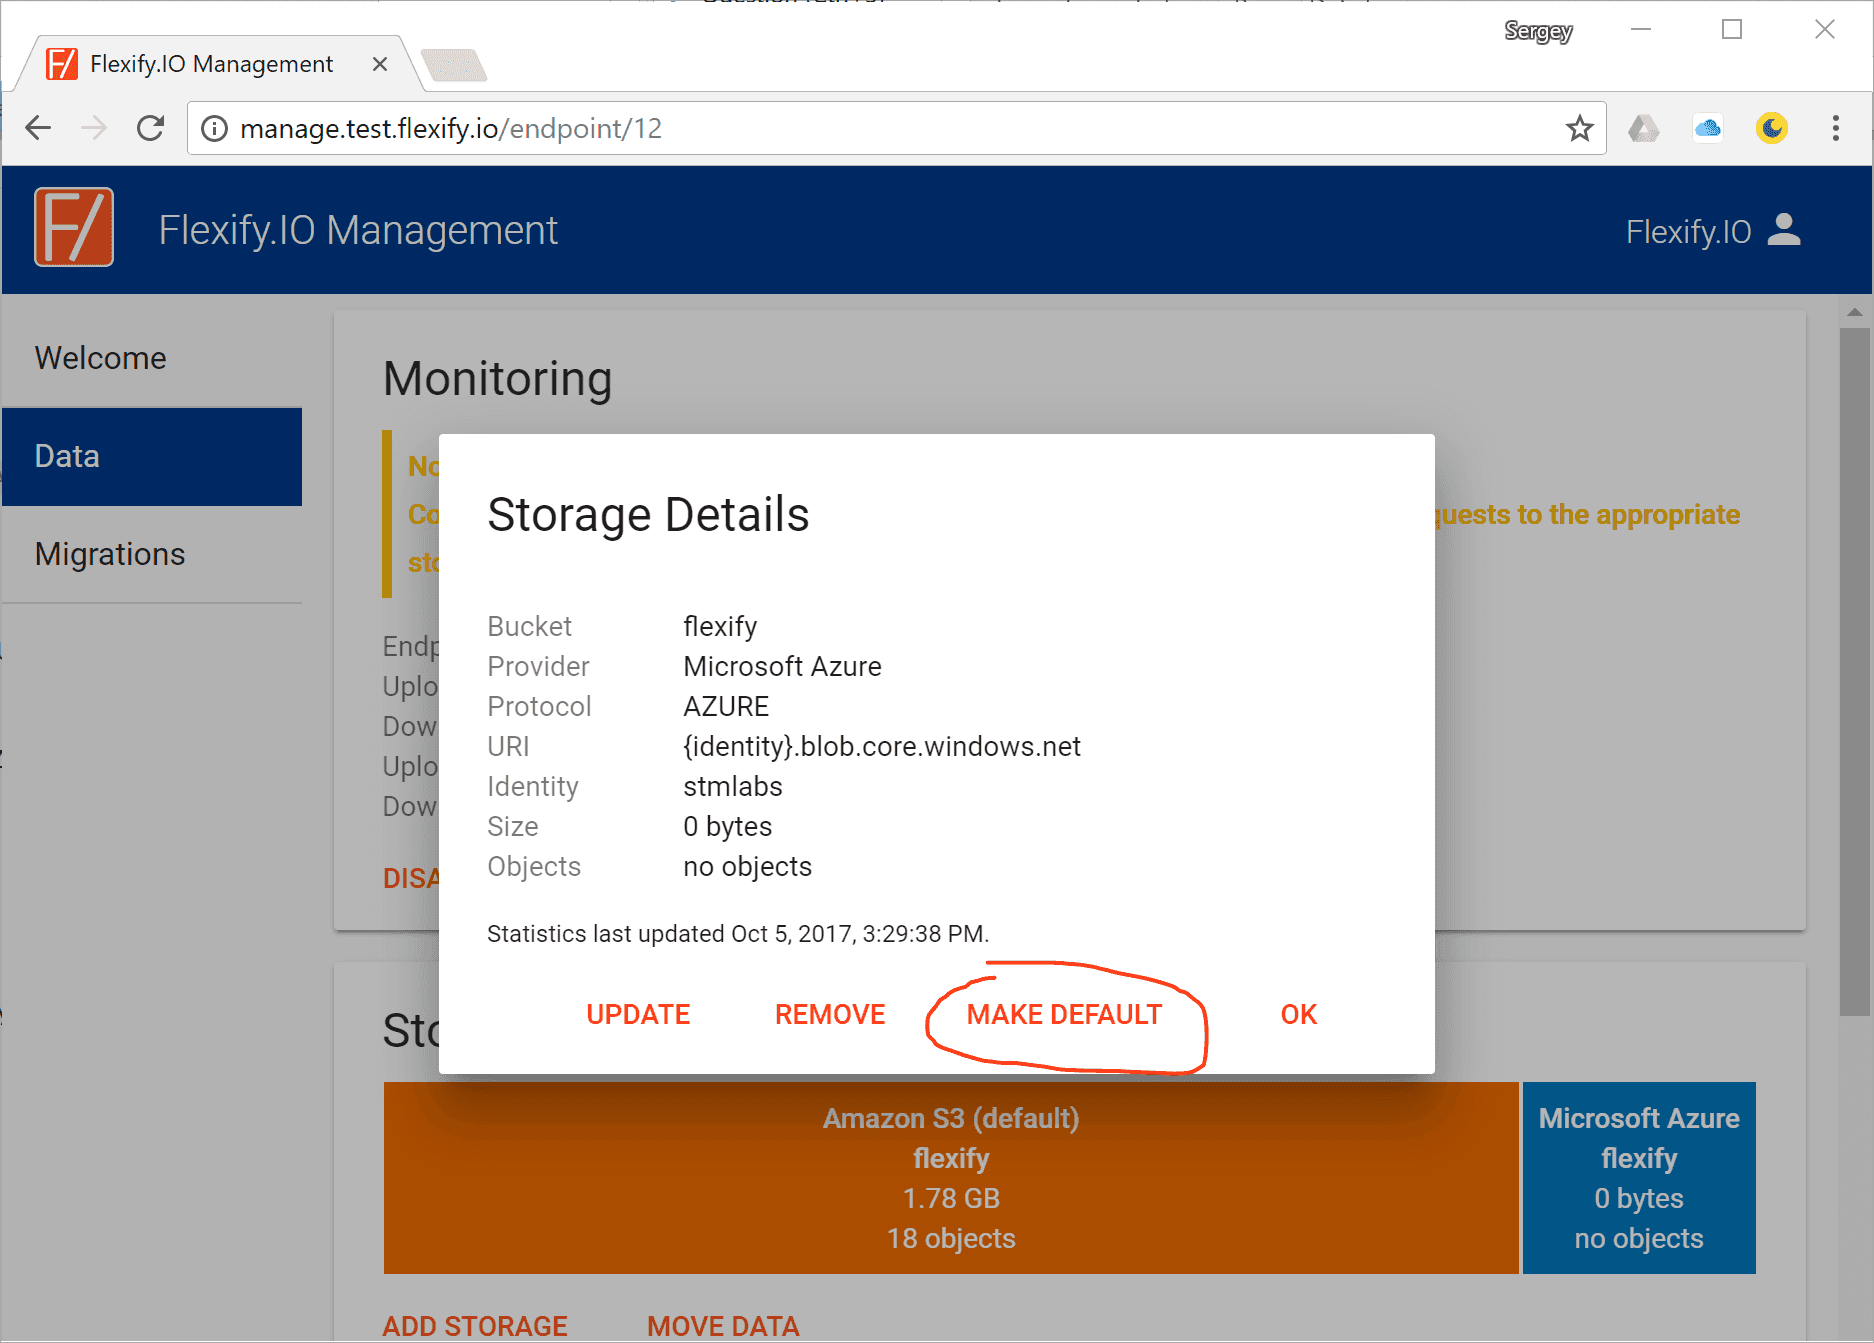
Click on your destination storage and make it default.
Hint: Flexify.IO forwards data your application writes to the default storage.

-
Now you can start migration by clicking Move Data and, no matter how long it takes, your application will have access to all the data, migrated or not, all the time.
Converting Protocols
As you can see, one of the storages in our example is Azure Blob Storage. Your application is still using S3 protocol to access the data, and Flexify.IO transparently converts S3 requests to Azure requests!
When the migration is completed, you can safely remove your source storage from Flexify.IO configuration.
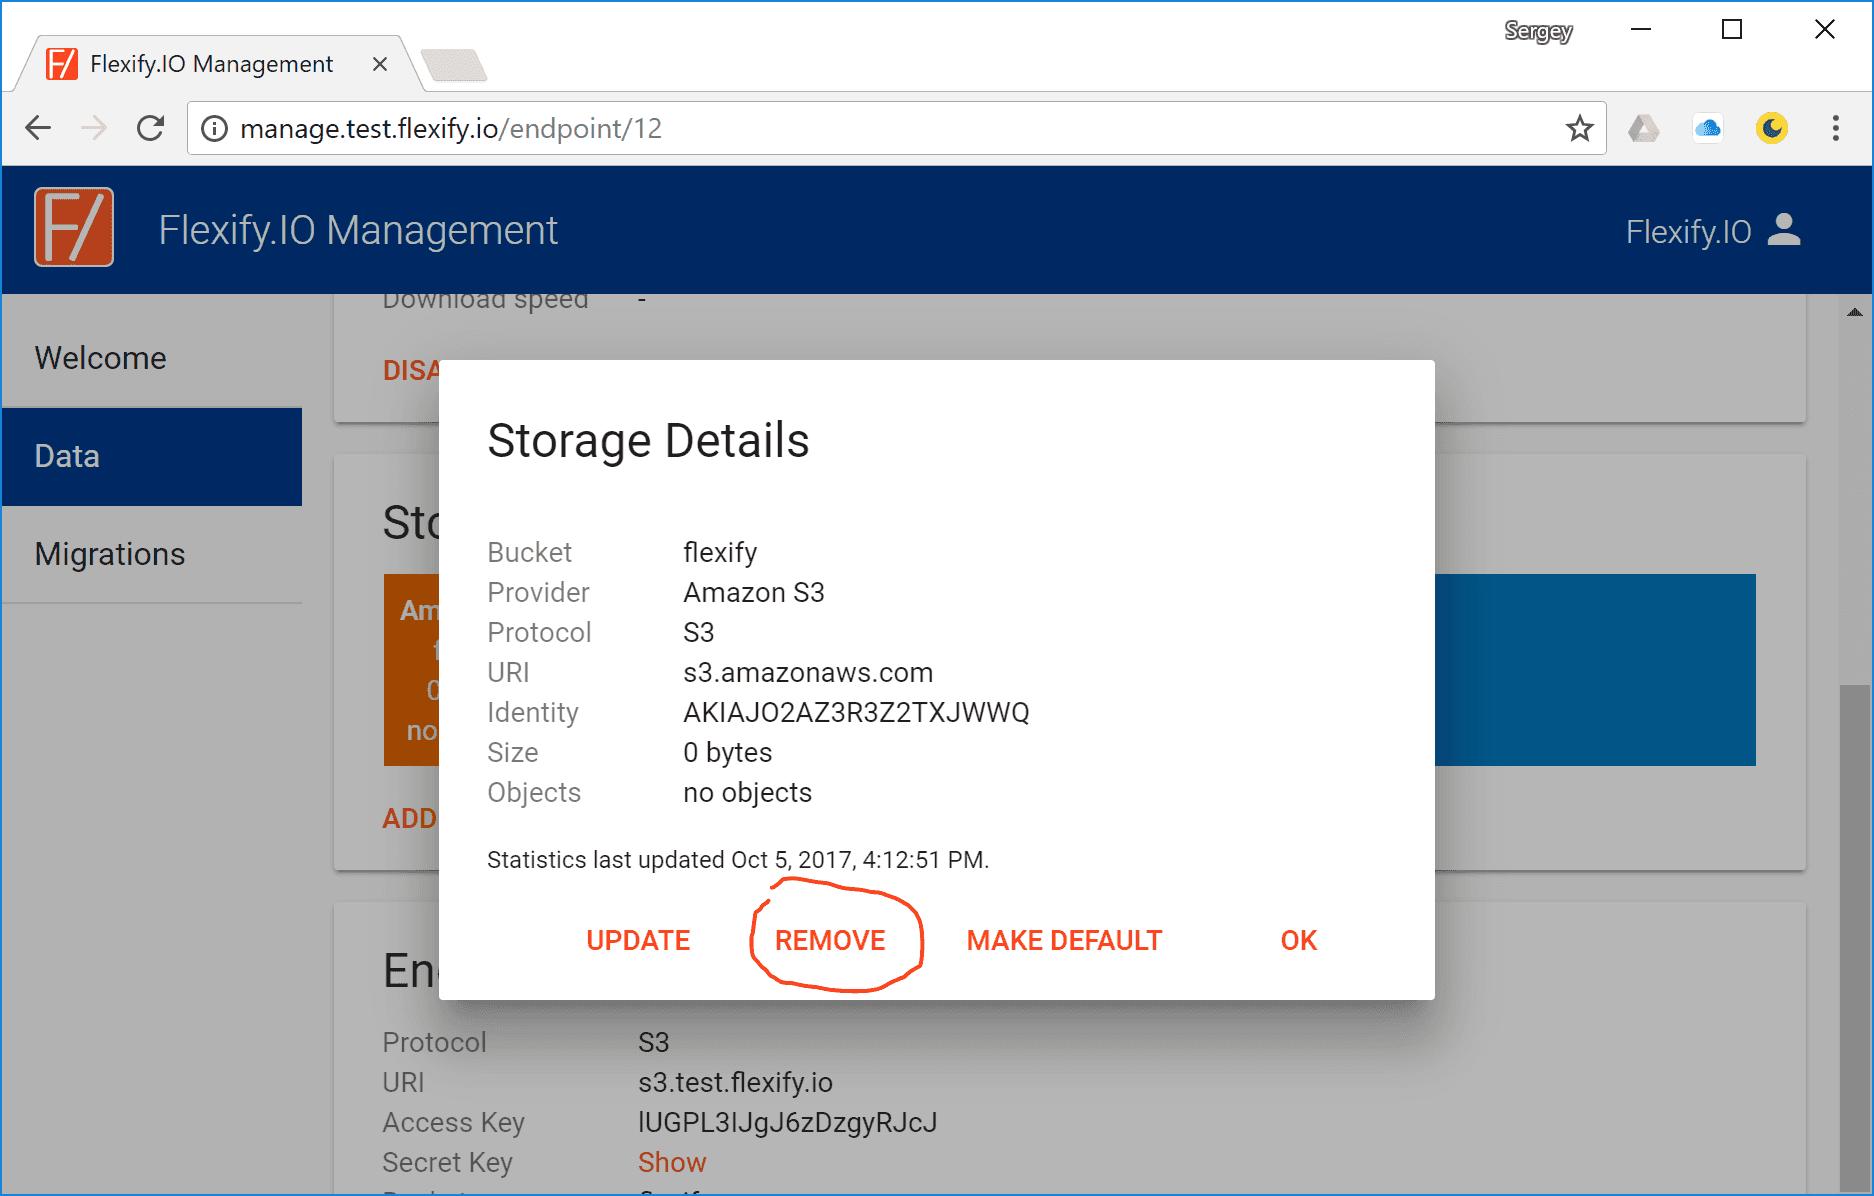
Now you S3 application works with data in Microsoft Azure!